"A person cooking is a person giving: Even the simplest food is a gift."

Laurie Colwin
Showing posts with label Mains. Show all posts

Thursday, January 5, 2012

How to do summer without sizzling like a silly sausage


Summer means barbequing.  That is, grilling.  Why?  I mean - I understand the concept of eating outside.  I understand the concept of not heating up the kitchen.  What I don’t understand is why, on a day so hot that birds are falling fully cooked from the skies, some poor sap has to lean over glowing coals and volcanic rock and flames, drip-basting meat with his own sweat, and pretend that this is the perfect way to cook in warm weather.

Think about it:  those barbeques and grills get way hotter than your standard burner, your standard skillet, or heck, even your standard carbonize-you-at-closer-than-twenty-paces wok.  OK so barbeques and grills don’t heat up the kitchen like an oven does, but at least you don’t have to lean over an oven, flipping slices of eggplant every two minutes so they don’t self-combust.

So, much as I like them, summer barbeques don’t make all that much sense to me.  My heart always goes out to the aforementioned poor sap, particularly when the poor sap is a Sap on a Mission, like the venerable Sausage Sizzle.

Despite what Hoges may have said back in the '80s, the thing that is thrown most often on Aussie barbies isn’t shrimp, but sausage.  Putting a few snags on the barbie is pretty standard – on their own, or as part of a range of grilled meats – in the home, but outside the home, a sausage sizzle is one of the most common fundraisers.

Go down the street, go to the hardware store, and chances are that your local fire brigade or primary school will be having a sausage sizzle fundraiser.  $1 or $2 will get you a sausage in bread, with lots of nicely browned onions on top, and your choice of sauce.  Yes, it’s cheap, so yes, you can afford to give up another $1 or $2 because the guy (almost always it’s a guy) has been sweating over that hotplate since 9.00am and sizzling along with the sausages because his wife is in the Parents’ Association and she’s told him he’s got to do it or he won’t get any nookie for another month and HE DESERVES IT.

At home, when it’s truly hot, my barbeque stays under cover.  But sausages in bread are expected in summer, so sausages it is, with exactly the same flavour if not better flavour as barbequed, courtesy of my electric frying pan.  No heating up the kitchen.  No working over a hotplate.  No constant watching.  No sizzling except what should be sizzling in the pan while I’m sitting on the verandah, feet on my own poor sap’s lap, chatting a little dozily while we make the ice clink in our drinks.  Barbeque schmarbeque.  Feels like summer to me.

Just three easy steps, I promise.  First, chuck everything into your pan.  (No, you're not imagining it, my sausages here are two different colours.  Half are pork and half are beef.)
All right so at the end of Step 2, it pretty much looks like a dog's breakfast.  But it'll come good.  Promise!
See?  Toldja it'd come good!  Now where are those hot dog buns?...

THE SAUSAGE SIZZLE – MINUS BARBEQUE
This is such a low-effort, forgiving recipe – fiddle with the quantities, add ingredients, make it in advance, keep it warm – that it’s perfect for those lazy summer days.  If making it advance, however, it’s best done to the end of Step 2; they are best browned just before serving.  What I like to do is keep the sausages warm in the pan, pile split buns in baskets beside them, provide ketchup and mustard, and just let everyone help themselves.

(8 servings)

Ingredients:
1 kg. high-quality, high meat content sausages, such as pork, beef, bratwurst
1 kg. onions
500ml beer (what kind isn’t really important, as long as you stay away from the dark stuff – I actually used a non-alcoholic “brewed beverage”)
2 tbsp. seeded mustard
1 tbsp. oil
To serve:  hot dog buns or other bread, ketchup, mustard, and other condiments of your choice

What you do:
1.  Prick sausages several times.  Place in electric frying pan or a sauté pan large enough to hold the sausages in a single layer.  Slice onions very, very finely (a food processor or mandolin is the thing to use here) and add to pan along with remaining ingredients.  Stir briefly to combine.
2.  Bring to the boil with (or over) high heat.  Cover, and reduce heat to low.  Simmer until sausages are cooked through and onions are very tender – about 20 minutes.
3.  Uncover and increase heat to medium high.  Cook, stirring occasionally, until liquid has evaporated.  Keep cooking, stirring regularly, until sausages and onions are golden.  (Be careful when stirring:  cooked sausages can break quite easily.)  Serve sausages and onions in buns or bread with your favourite condiments.

Yumbo McGillicutty!

Wednesday, November 2, 2011

Hotspots and hotpots


A few years ago, I left the town I’d lived in for over 20 years because there wasn’t any reason left to stay any more.  And because the time was right, the leaving was easy.  But of course there’s stuff you miss:  friends, walks along the river, friendly faces down the street, and my wholefoods shop.

Yes, my wholefoods shop.  There was a time when it was my shopping hotspot: 3/4 of my household food budget was spent on fruit, veg, and stuff bought at the wholefoods’, and 1/4 at the supermarket.  It wasn’t just that what I bought there was wholesome and cheap, but I loved the experience of shopping there.  I’m sure that there must have been times when I was rushed and cranky and would have wished for the convenience of rushing in and picking up a pre-packaged kilo of whatever wholegrain goodie I needed, but I can’t remember any.  I just remember shopping there as an unrushed, almost meditative activity, like grocery shopping seldom is any more.  Go in, grab a baggie, open up a bin full of wheat, soybeans, or oats, scoop some out with the metal cup and fill the baggie up.  Weigh out a jar you’ve brought and fill it up with honey or tahini.  Help yourself to the precise amount of herb or spice you need from the dozens of jars on the counter.  Grind your own peanut butter.  Order a soft-serve banana “ice cream”, made by running whole frozen bananas through the Champion juicer.


I don’t have a wholefoods place nearby any more.  I’m sure my diet suffers because of it (where do I buy large quantities - but not bulk - of non-GM soybeans for my unused soymilk maker?), but even if I did have one, I wonder whether I’d get the same pleasure.  After all, I was a stay-at-home mum in that small town, and although time was still at a premium, I was able to set some aside for shopping there.  These days I hold down jobs, plural, and what would I do?  I don’t know.

But a couple of days ago I found myself in my old town.  It is still so familiar, but I feel so foreign in it now, except in once place.  For the first time in 3 1/2 years, and urged by my younger son who has been craving that peanut butter all this time, I went to my wholefoods shop.


I scooped up burghul, quinoa, chia seed, and three-grain porridge into baggies, let my son grind up not one, but two containers of peanut butter and pour out some gorgeous red stringybark honey, and bought a massive container of the best fruit mince in the world – citrusy and rich, but without the customary suet.  And we had an awesome time.  Heaps fun.  Sure:  I didn’t buy anything so exotic that couldn’t have been picked up (albeit in smaller quantities) at the supermarket, but would the experience have been as good?  My grin as I walked out of the wholefoods shop munching on an almond-coated fresh date treat could have told you all you need to know.


A two-and-a-half-hour drive home later, I put the barley and chickpeas I bought to good use and kept the good vibes going as the temperature dropped outside and I cozied up in the warmth of the place – and person – I am not foreign to these days.   


BARLEY AND CHICKPEA HOTPOT WITH CHORIZO AND CHARD
OK, yes:  this does contain rather a lot of oil.  But it makes for such a luscious dish and delicious juices that you’ll be begging to mop up with good bread.  Go on – thanks to all those good ingredients, it won’t hurt you.
(6 servings)

Ingredients:
1/2 cup olive oil, or EVOO and vegetable oil, half and half
1 red onion, roughly chopped
4 garlic cloves, roughly chopped
4 chorizos, sliced
1 cup barley, washed
2 cups cooked chickpeas
1 bunch Swiss chard (silverbeet), stalks and leaves separated
4 cups water
2 tbsp. tomato paste
Salt and freshly ground pepper to taste

What you do:
1.  Heat olive oil in flameproof casserole over medium heat.  Add onion and garlic, and sauté, stirring occasionally, until onions are translucent.
2.  Add chorizos, barley, chickpeas, sliced chard stalks, water, and tomato paste.  Bring to the boil, then cook at a high simmer for 30 min.
3.  Add chopped chard leaves, and salt and pepper to taste.  This isn’t a soup, but there should be just enough liquid left over in the bottom of the pot to steam the chard; if there isn’t, add a little water.  (Not much - 2 tbsp. maximum.)  Increase heat to high, jam lid on, and cook for 10-15 min, stirring once or twice, until chard is cooked through.  Serve hot. 

Yumbo McGillicutty!

Tuesday, October 11, 2011

Tarty Tuesdays: Bacon and Tomato Tart


Sometimes I wonder why I bother posting some recipes:  they’re so simple, and their ingredients are so few or unremarkable, that in an increasingly sophisticated foodie world they are likely to make the casual blog browser shrug and go “Meh,” before surfing away.

Here’s the thing, though:  good ingredients only need simple a treatment.  Good ingredients can make a simple dish taste absolutely divine.  In this case, just one ingredient:  beautiful tomatoes.


Unless you grow your own, beautiful tomatoes that smell and taste as God intended are as rare and precious as truffles.  When you see them, you bow your head, say a little prayer of thanks, buy as many as you can, and get them home with all due haste.  Slice them up thick for a mayo-slathered sandwich, or drench them with olive oil and perfume them with basil.  Or just bite into one like an apple, perhaps powdering each bite with a drift of sea salt.  Any leftover ‘matas can go into this tart, which is far greater than the sum of its parts.

A bit of a leap of faith is necessary here, because I really can’t tell you how special this tart - which was demolished in one sitting by a small number of diners that included tiny, picky eaters - is.  You’ll just have to find great tomatoes, make it and eat it.  Then you can tell me.  


BACON AND TOMATO TART 
(6-8 servings)

Ingredients:
1 x recipe Nidia's Tart Crust, or enough shortcrust pastry for a single crust
600g. small, ripe tomatoes, blanched and peeled
salt
2 tsp. olive oil
1 1/2 onions, sliced
300g. bacon, diced
4 large eggs
250g. cheddar (white cheddar in the US), grated
1/4 cup homemade mayonnaise or cream
freshly ground pepper to taste
fresh oregano leaves, to taste

What you do:
1.  Preheat oven to 180oC and lightly grease tart pan.  Line tart pan with pastry.  Quarter tomatoes and remove seeds.  (I did this straight into a plastic container.  The seeds have gone into the freezer for the next time I make sauce.)  Sprinkle with salt, toss, and place in colander to drain while you make filling.
2.  Heat oil over medium heat and add onions. (I also add the bacon rinds at this point for extra flavour and moisture, and remove them when they’ve finished rendering, whereupon hungry vultures - my sons and husband – descend and demolish them.)  Sweat until translucent.  Add bacon, and increase heat to high.  Sauté, stirring occasionally, until bacon begins to brown.  Set aside. 
3.  In a bowl, combine eggs, cheddar, and mayonnaise or cream, and season with lots of freshly ground pepper – you won’t need salt.
4.  To assemble tart, line tart pan with crust.  Spoon in bacon and onion, then evenly spread cheddar mixture over the top.  Press tomato quarters, cut side down, into cheddar mixture.  Scatter over oregano leaves.  Bake for 45 minutes, until set and golden.  Allow to settle for a few minutes before unmoulding and serving.

Yumbo McGillicutty!

Monday, July 18, 2011

Tarty Tuesdays: bacon, apple, and Tasmanian Blue pie

Yes, I have been writing, and yes, I have been cooking, but I have not been writing about cooking.  It’s been a while, but I’ve been busy, even if some of my endeavours have been… shall we say… frivolous.

Japanese-style potato salad with a garnish that made strange but perfect sense.

Although I was dragged kicking and screaming back into the training kitchen at work, I was delighted to suddenly remember that teaching people how to cook means I can now buy cooking-related stuff for teaching resources and claim it on my tax.  So yes, OK, I bought a gadget that turns a boiled egg into a bunny, but I’ve also been buying things that are entirely useful.

Let me introduce you to Harold.

Harold – or, as it is properly known, the Harold Pie Crust Maker – has come into my life to end another cooking-related bane:  Rolling Pastry Into a Perfect Circle.


'Allo, 'Arold!

Oh, it’s a pain.  Not just the mess – mess I can cope with, as befits a woman who has messed up her kitchen doing everything from shucking 200 corn cobs for freezing to making her own tofu every week – but getting the circle right, without tearing-and-patching, without wonky bits, and without having to trim.  Harold puts an end to all that.  Pop your ball of pastry or dough in the floured bag, zip ‘er up, and roll away.  A minute or two later, you have your perfect circle.  Last week when I was on holidays and playing Happy Hausfrau and making stuff to pop in the freezer, I made five 35cm crusts in 15 minutes, which included the time spent making the pastry.


I took two of them out today, and set about making an awesome vehicle for the Heritage Blue cheese that had reached peak ripeness and wouldn’t see another few days.  I remembered, back in the 80s, making an apple, bacon and blue cheese tart out of Australian Gourmet (before it wedded Traveller), but I couldn’t be fizzed leafing through back issues, so I just decided to make it up as went along.  


Just before the tossing the bacon back in the pan.  Tossing things together for a minute or so over a higher heat is what Marcella Hazan calls "insaporire" - "make tasty".  It's almost always a good idea to toss things with the sautéed aromatics before going ahead with the recipe.

Blurry pic, but it's clear just how delicious this is going to be.  See the little fresh thyme leaves?  Doesn't it make you wanna go out and plant some herbs?  Well, it should.  No, really:  YOU SHOULD.

Then along came my professional photographer husband and took the only good picture of the batch.  Sigh...
Anyway, if your filling is too thick to pour, you can slacken it with milk, but just a tad.  A couple tablespoons to a quarter cup, tops.

It was a tight fit, so I didn't crimp together top and bottom.  The pie held together fine, and had extra give which was awesome since the filling had a soufflé thing going on and rose quite high during baking.  It fell dramatically when I took it out of the oven, but it's still higher than it started out.

Because as you know, you don’t really need a recipe to make a tart.  For that same reason, I'll also tell you that this pie is also very, very delicious made with pears, or pears and apples half-and-half.

  
BACON, APPLE, AND TASMANIAN BLUE PIE

Ingredients:
250g. bacon, cut into thin strips
1 onion, thinly sliced
2 stalks celery, finely chopped
2 apples, peeled and finely chopped
Fresh thyme
140g. Tasmanian blue cheese, such as Heritage, or other smooth and rounded blue cheese (stay away from the harsh Danish stuff)
4 eggs
300ml. sour cream
Freshly ground pepper
2 x recipe Nidia's Tart Crust, or enough shortcrust pastry for a double crust
2 tbsp. dried breadcrumbs or flour (opt.)
Eggwash

What you do:
1.  Preheat oven to 180oC.  Grease tart pan or brush with Baker's Secret.  Lightly oil a heavy sauté pan.  Cook bacon over low heat until it is soft and fat has rendered out.  Do not allow to crisp.  Remove with a slotted spoon and set aside.
2.  In same pan, sweat onion, celery and apples until tender but not mushy.  Add bacon and thyme, and toss over medium heat for a minute or so.
3.  In a medium bowl, mash blue cheese, then add eggs, sour cream, and freshly-ground pepper to taste.  Combine well.
4.  Line tart pan with crust, and sprinkle with breadcrumbs or flour.  (This step is optional, but you may want to consider it since the filling can get juicy due to variables in the bacon and the fruit.)  Spoon in bacon mixture and spread evenly.  Pour over blue cheese mixture, spreading it as evenly as you can.  Top with second crust.  Brush with eggwash, and bake until crust is golden and filling is set.  


Yumbo McGillicutty!

Tuesday, January 11, 2011

Everything old is yum again: garlic prawns


My Baby and I were trying to decide where to go out for dinner.

“What do you feel like?” he asked.

“Garlic prawns!” I exclaimed, then, thinking about it, went off on a rant.  “But where can you get garlic prawns these days?  They used to be on every bloody menu in every bloody restaurant, but now they’re gone!  Why?  WHY?”

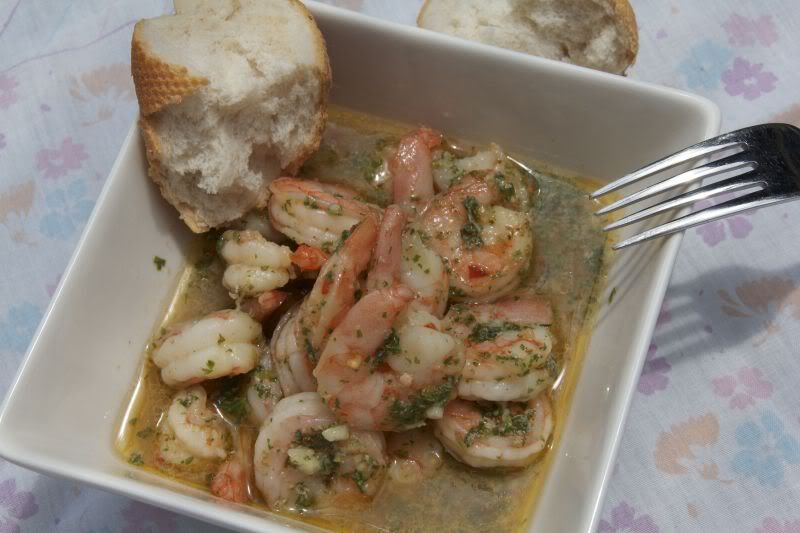
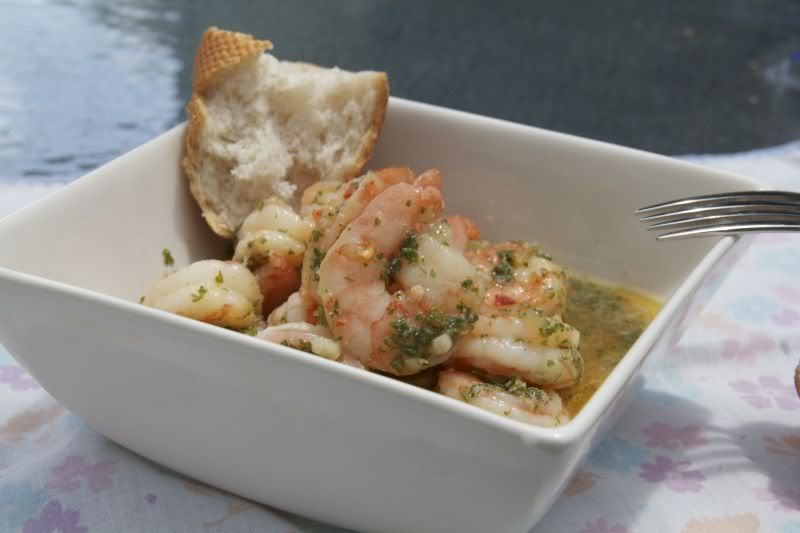
Well, we know why.  Food is subject to fashion as much as anything else, but it probably shouldn’t be; not when you remember how enjoyable some things – simple things - can be.  And what’s not to enjoy about the freshest, crunchiest prawns, with a puddle of the most deliciously garlicky, olive-oily juices to mop up with crusty bread?

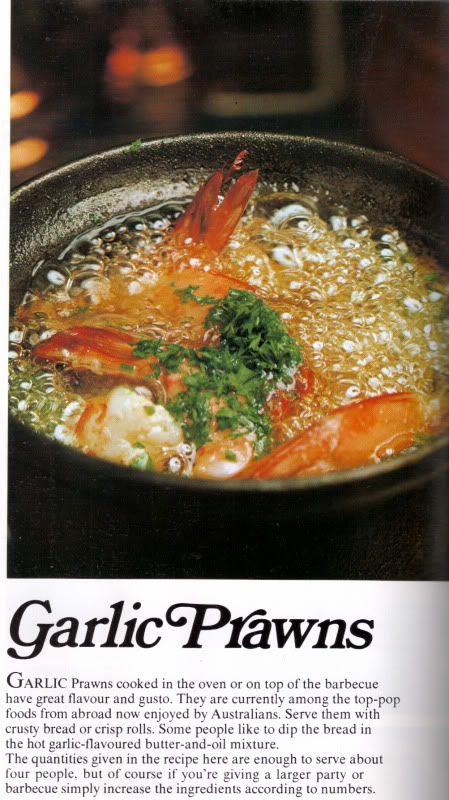
Although garlic prawns were subject to much bastardisation (particularly featuring pre-cooked prawns – shudder), those of us Of A Certain Age remember, in far less sophisticated, multicultural times, asking for them at the local pub or “continental” restaurant, where they would come, still sizzling, in an individual cast-iron cocotte sitting on its own wooden plate so it wouldn’t burn the dinner table.  Indeed I have a recipe here, from my trusty Australian Women’s Weekly Cooking Class Cookbook (no publication date listed), that describes the dish as one of the “top-pop foods from abroad”, and that expression, right there, tells you all you need to know about Australian cuisine in the mid-to-late 70s.


But coincidentally, while reminiscing, as well as ranting, I stumbled upon a recipe for Dee Dee's Sizzling Spanish Garlic Prawns, and therefore decided to stop reminiscing and ranting and just make them already.  With my ready-made provenzal, I literally had them in the pan in two minutes, and we were seated at table with garlicky, prawny goodness in front of us, 15 minutes after that (which includes plating-up time).

So here’s my take on Dee Dee’s already fine recipe.  I made these in one large pan, but if you want to dig out Mum’s cast-iron cocottes for individual servings, please do so, with my blessing.  Send pictures so that I can shed a sentimental tear.


GARLIC PRAWNS

Ingredients:
1 kg. green prawn meat (deveined)
1/4 – 1/3 cup provenzal
1/3 cup dry sherry
1/4 cup extra-virgin olive oil
1 tsp. dried chili
salt

Method:
1.  Preheat oven to 220oC.
2.  In a large cast-iron frying pan combine all ingredients except salt (salting prawns before cooking makes them tough – go figure since they’ve been living in salt water), making sure that prawns are well coated.
3.  Bake for 12 minutes, stirring once.  Salt lightly, and serve immediately with something starchy to mop up the juices.  (Rice is good – particularly if tossed in butter and Parmesan - but crusty bread is indispensable.)


Yumbo McGillicutty!

Wednesday, September 22, 2010

Don't be mean with the beans, mum

It’s not heartening when you tell your husband that you’re having baked beans on toast for dinner and he counters by offering to make dinner reservations.

But OK, let’s give the man a break.  As a husband, he’s pretty new, without benefit of the common-law marriage prior to moving in, so he wasn’t to know that I wasn’t going to open up a can of Heinz’s best to dump on top of some poor unsuspecting piece of toast.

Heinz’s best, by the way, are something I despise, despite their iconic status.  No icon can take my attention away from the fact that what I’m eating is slimy, slippery, and much too sweet in altogether the wrong way.  (There is a right way for something to be too sweet – baklava, for example.  But more on this another time.)  Plus the “tomato” flavour is nothing like what a real tomato – even a tinned real tomato – tastes like.  That’s why I put together this recipe many years ago.  They’re not Boston baked beans, largely because I’m not a huge fan of the predominant molasses flavour, but they were my answer to Heinz for a daughter who really, really loved her beans on toast for breakfast and afternoon meal (she stopped eating lunch in high school and would be ravenous when she got home).  I added some brown sugar for a hint of molasses and sweetness, and went to town on the seasoning.  Who Heinz?

Back when I had a houseful of children, I would make twice the amount below and freeze leftovers in single portions in paper cups.  One of these takes about two minutes to thaw and warm through in the mikey; convenience food at its best.  Last night, we had them on beautiful sourdough rye toast and smoked cheddar, and they were still convenient.  Despite the long cooking time, during which the house was the best-smelling house on the street, dinner was on the table in a couple of minutes.

My husband wolfed down his plateful and apologised for ever doubting me.  And then I had him apologise a couple more times, just because he’s such a new husband that I can get away with this kind of thing for now.  


STICKY BAKED BEANS
These baked beans don’t need the pork, and will still be delicious and sticky without it.  And by the way, if you haven’t made my beautiful sweet chilli sauce yet and are looking for a way to use the bottle of commercial stuff you still have, this is the perfect recipe for it. (Serves 6)

Ingredients: 
1 tbsp. oil
2 onions, finely chopped
2 stalks celery, or green peppers (capsicum), finely diced
2 cups water or stock
3 tbsp. prepared mustard (I like these tablespoons to be heaped)
1 1/2 tsp. salt or to taste
1 cup tomato passata
2 tbsp. tomato paste
1/4 cup sweet chili sauce
1/4 cup brown sugar
1 tbsp. Worcestershire sauce
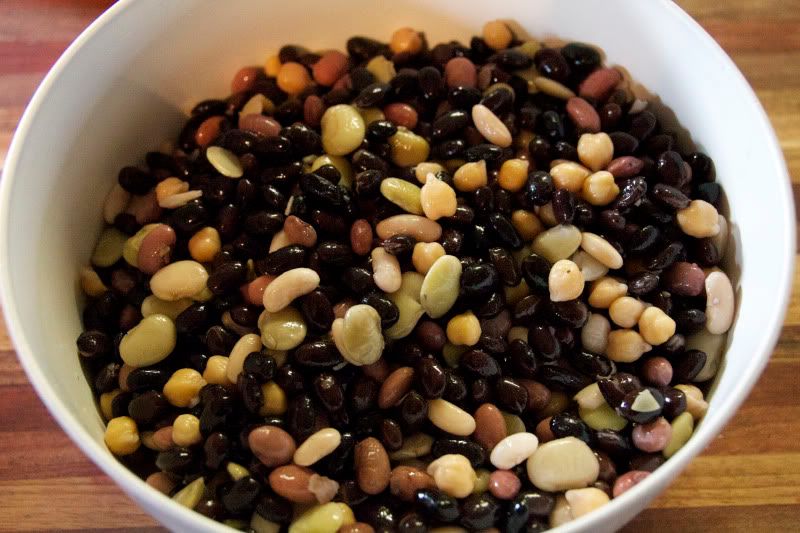
4 cups cooked, but al dente, beans – I used a mixture of black turtle beans and four-bean mix (tinned are ok if you must, but rinse before using, and understand that there is a risk they will go mushy)
1 ham hock OR several bacon bones OR 250g. bacon in the piece(opt.)

What you do: 
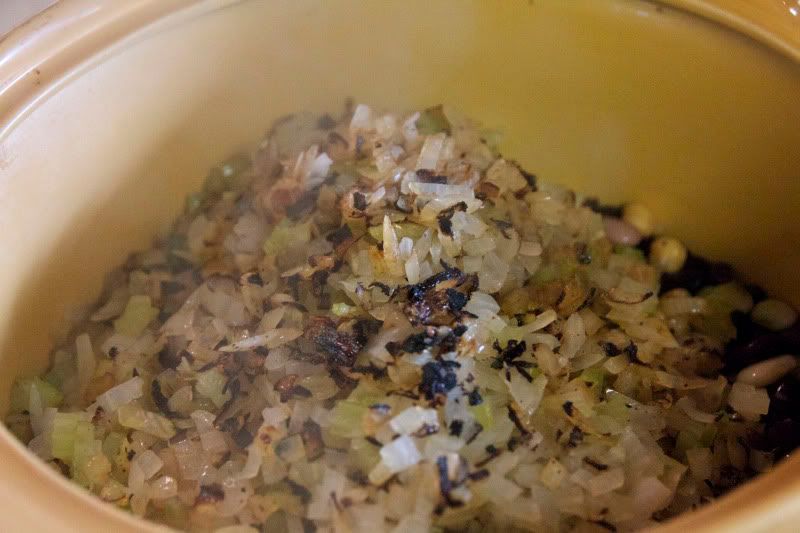
1. Preheat oven to 160oC.  Heat oil in a frying pan. Add onions and celery or peppers, and cook for about 10 min., stirring occasionally, until onions are lightly browned
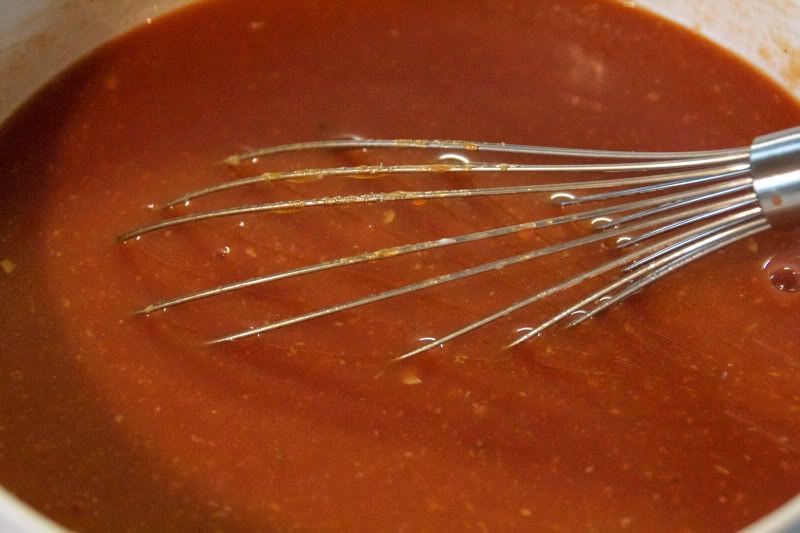
2.  While the veggies are cooking, whisk together the water or stock, mustard, salt, tomato passata and paste, sweet chili sauce, brown sugar, and Worcestershire sauce.
3.  Combine beans and veggies in casserole with a tight-fitting lid, and stir in sauce mixture.  Bury the ham hock, bacon bones or bacon in the middle. Cover casserole, and bake 3-4 hours, removing the lid for the last hour of cooking.  Beans should be tender, thick, and slightly sticky. You can remove bacon or ham hock and set aside for another use, or chop and add to beans.


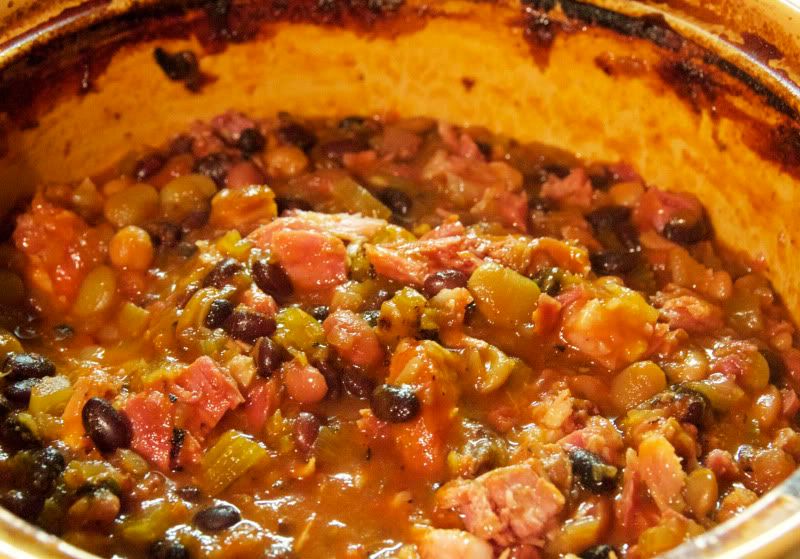
Here are the soaked and pre-cooked beans.  They are still quite al dente.  This will prevent mushiness in the finished dish.
Yes, the sauce mixture looks Heinzey when you put it together, but it comes good in the end.

Add the sautéed veggies to the beans.  I like to let my veg catch and scorch just a bit.  It adds depth and flavour to the sauce.

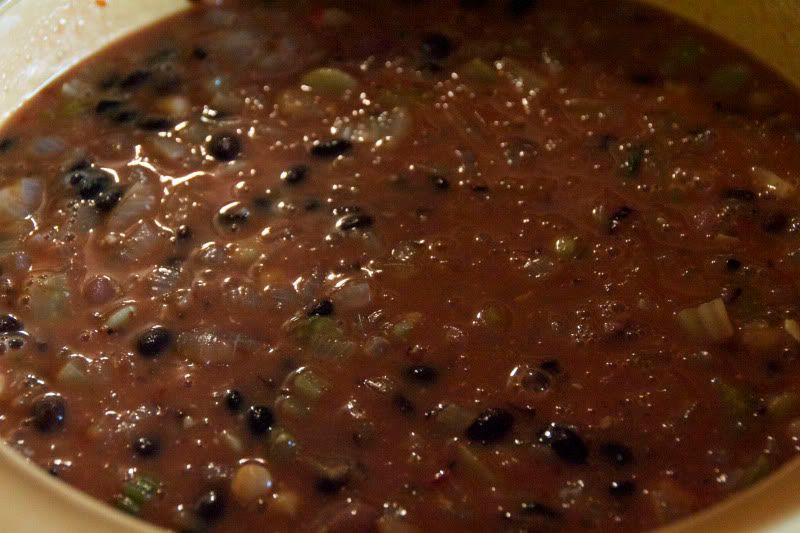
Add the sauce mixture to the beans and veg.  

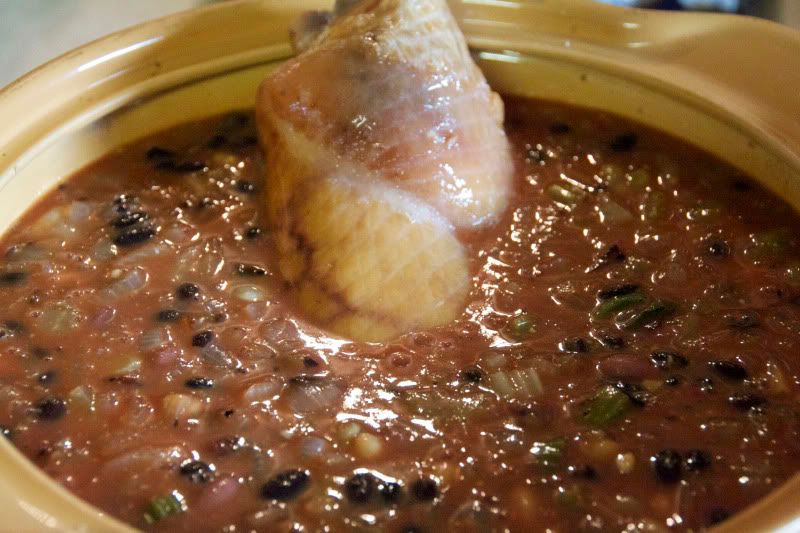
If using the ham hock or bone, bury it in the middle.  By the way, you're not imagining it:  this is a huge casserole.  I doubled the recipe on purpose to have leftovers to freeze in individual portions in ziploc baggies.  

By the end of the cooking time, the mixture should be thick but the beans still plenty moist, with lots of sticky, but not runny, sauce.  Remove the meat from the ham, dice finely, and mix into the beans if you like (I do, and did).

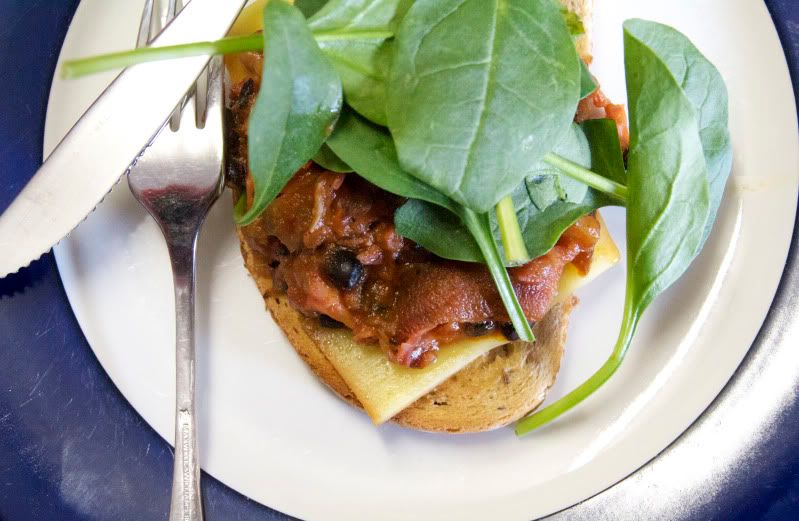
Here they are on hausbrot with smoked cheddar and spinach that will eventually wilt from the heat of the beans.
Yumbo McGillicutty!


Sunday, August 22, 2010

Poha

OK so  I posted my recycled recipe for the poha leftovers before posting the recipe for the poha itself.  But this is an actual recipe, you know, with quantities and proper ingredients and times for cooking and stuff.  Oh, the pressure.

I read about poha a couple of weeks ago when looking at the brilliant Time photo essay, What the World Eats.  Without passing judgement whatsoever, it’s just fascinating to see what people eat on a daily basis, because food isn’t just one of the defining facets of culture, but it can also reflect everything from socioeconomic status, to religion, to the topographical landscape.  And the families in the pictures aren’t just asked to show what they eat in a week, but also to tell what they love to eat.  Hands down the family that gave me the biggest kick was the Melansons of Iqaluit, Nunavut Territory, Canada, who list their favourite foods as “narwhal, polar bear, extra cheese stuffed crust pizza, watermelon”, but the ones who sent me Googling were the Patkars of Ujjain, India, whose family recipe is “Sangeeta Patkar's Poha (Rice Flakes)”.

At this point, I felt cheated, because I felt I should know what these rice flakes were, but didn’t.  Even though I love and adore Indian food, maybe it was just something too exotic for me to have encountered before, I thought.  I asked Google.  Google said no.  Google said that poha is also known as flattened rice or beaten rice, and is very popular in India, particularly for breakfast.  Oh.  Thanks, Google.

Thick poha

At the Indian grocer’s near work, I found that poha comes in several thicknesses, and is a top convenience food.  Not only is it ready in half the time as rice, but you only need to rinse or soak it before cooking, if cooking it at all.  And it is light and fluffy when ready, in the way that you want rice to be but sometimes isn’t.

Poha with potatoes is a pretty standard combination, and once I knew what other cooks do to make it, I made my own.  But this is just the beginning, I reckon, and I can already see the possibilities for poha pilaf, poha ruz bish'irreeyeh, or even buttered poha with Parmesan on the side of something equally yummy.

While I enjoy a slice of cold pizza for breakfast as much as the next person (oh go on, admit it), and this poha is truly delicious, I don't think I could have it for brekkie.  So I served it for dinner with spinach sautéed in onion and garam masala and thick yoghurt stirred in.  But you don’t need an accompaniment.  This comforting bowlful o’carbs has pretty much everything you could want or need, as evidenced by the three main men in my life, who wolfed down massive helpings.


SPICED POHA WITH POTATOES AND CHICKPEAS
(serves 6)

Ingredients:
2 cups thick poha
2 tbsp. oil
2 tsp. mustard seeds
1 onion, chopped
2 green chilies, chopped
1 tsp. turmeric
a few curry leaves
a pinch of chili powder (opt.)
2 medium potatoes, diced
1 large tomato, chopped
1 cup cooked chickpeas (tinned are OK)
1 cup frozen peas
1/4 cup slivered or flaked almonds
salt and pepper, to taste
chopped coriander (cilantro), to taste
fresh lime or lemon juice, to taste

What you do:
1.  Put the poha to soak in a bowl of cold water while you prepare the vegetable mixture.
2. Heat oil in a large frying pan over medium-high heat.  Add mustard seeds.  When they pop and sputter, reduce the heat to medium and add the onion and chilies.  Sauté, stirring often, until onion is translucent, then add turmeric, curry leaves, and chili powder if using.  Stir constantly until aromatic.
3. Add potato and tomato, and jam the lid on.  Cook, stirring occasionally, until potatoes are tender but firm to the bite.  Add chickpeas, peas, and almonds, and allow to cook a few minutes.  Taste for salt and pepper, remembering that the poha is bland, so the flavour of the vegetable mixture will have to have oomph.
4. Drain poha, and stir into into vegetable mixture.  Jam lid on, and cook 5-7 min over low heat.  Fold in coriander and lime or lemon juice to taste.  Poha should be fluffy, so be careful when you do this so that you don’t break it down to mush.


 Swaadisht!