Monday, December 20, 2010

La ensaladita


How many times have I tried to write this entry?  Many.  Every time I start, my emotions run away with me and I hit the “delete” button just as the voices in my head start screaming, “MAUDLIN!”

But write it I will, albeit in shortened form, because it’s the end of the year, and as I count all the blessings I received in the last 12 months, I must also take note of what I lost.  Only one thing fills my mind:  Dani.

My beloved cousin Dani was a year younger than I.  Some months ago, unthinkably, suddenly, and tragically, she died.  I can’t tell you what this loss meant and continues to mean.  But the people who have known me the longest could tell you that while most little girls feel the first stirrings of motherly instinct with their dolls, with me it was with Dani, and that explains just about everything you need to know.

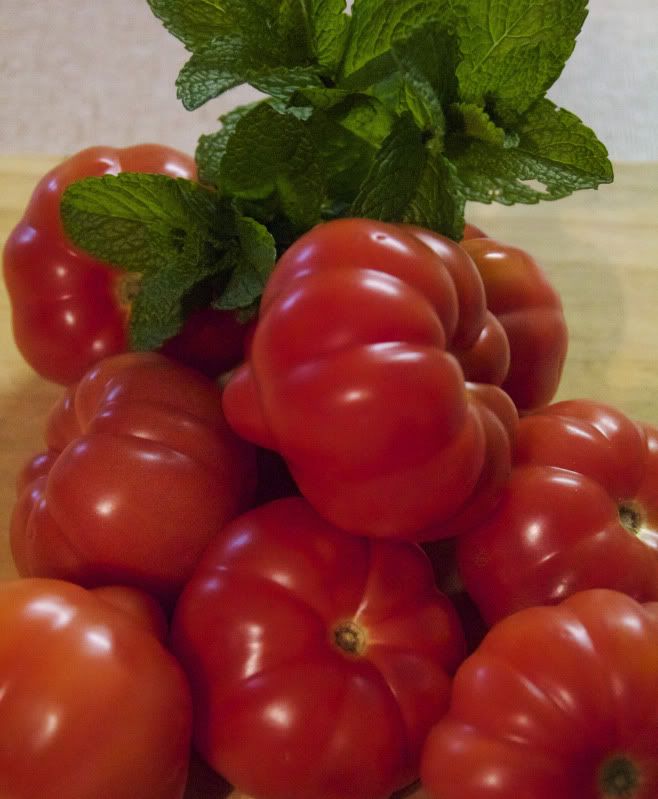
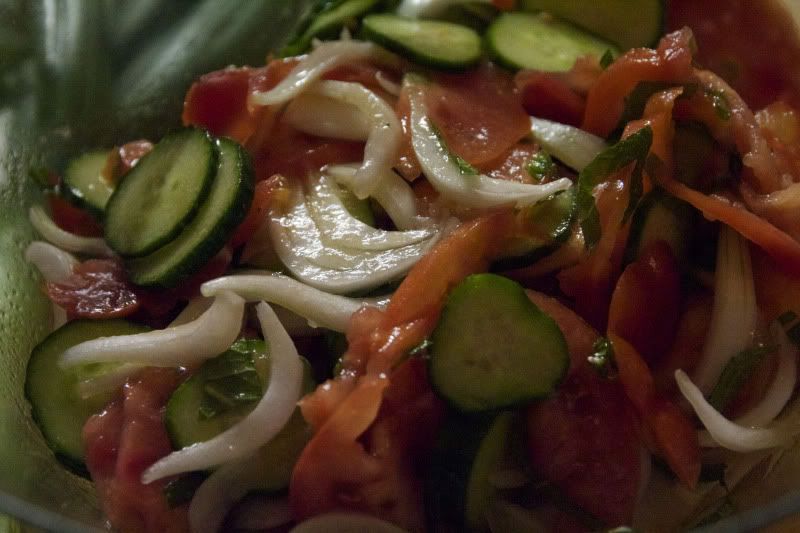
One of my favourite memories of Dani and me is of me organising picnics where I would make “la ensaladita” – a little salad.  This little salad was one I’d watched our grandmother Elsa make countless times, and I want to share it now not just because I’m thinking of other times and other places, but because there is something you should know:  tomatoes and mint are a heavenly combination.

Somehow, in our passion for tomatoes and basil, we have forgotten this.  But it’s worth remembering, as the only proper tomatoes of the year start appearing in the shops and the mint revives in sleepy gardens, often so enthusiastically that it threatens to take them over.  (My herb garden, by the way, is looking – for the first time in my life – like something out of a Better Homes and Gardens feature, with thyme tumbling down the walls, lush cushions of oregano, and mint with leaves as big as my hand).

So this isn’t a recipe, just a reminder:  tomato, and mint.  Yeah.

Enjoy this salad with someone you want to make a happy summery memory with.  


LA ENSALADITA

Ingredients:
Perfect, run-ripened tomatoes
Lebanese cucumbers, sliced
Salad onions, finely sliced
Lots and lots of fresh mint, shredded
Salt
Extra-virgin olive oil
Red wine vinegar

Method:
1. Cut tomatoes  into wedges, or cut in half and then cut into thick slices.  Combine with cucumbers, onions, and mint in a salad bowl.  Sprinkle with salt, then dress with salt and vinegar, and toss.  Don’t skimp on salt!  You need it to draw out the delicious juices of the tomatoes.
2. That’s almost it, except that although the salad will already smell divine and you’ll want to dig in immediately, it needs one final, vital step:  allow to rest at room temperature for at least 30 minutes before tossing again and serving.  Serve with plenty of crusty bread to mop up all the juices.


Yumbo McGillicutty!
  

Sunday, October 24, 2010

Runny rocks

Cooking should make you happy.  It isn’t martyrdom, and if you don’t enjoy the process, even if the results are fabulous, really, you should quit.  As Erin Pizzey said in her unforgettable Slut’s Cookbook (unfortunately out of print):

“Meals shared by members of a family or by friends should be cheerful times, not silent battles or competitions. […] Home cooking often comes with such a heavy measure of guilt that a tin of beans and a happy smile are preferable to the sight of women… tottering around the kitchen, muttering the equivalents of ‘Oy vay’.”

A person who makes me happy is RunnyRunny999, whose channel on YouTube is joyful and infectious.  Runny loves to cook, and as you’ll see at the end of his clips, loves to eat.  His dishes are simple and good and are for anyone who hasn’t been conned into thinking that home cooking should look like it came out of a commercial kitchen or been professionally styled (what I call Masterchef Disease).  Runny is also sweet and absolutely hilarious.

How sweet and hilarious?  Well, he actually cooked a request for my daughter’s birthday, and… Well, my description won’t do it justice.  Check it out.


Thanks, Runny.  You rock!


PS:  Sorry I can't format the vid to look right on the page!  Augh!

Tuesday, September 28, 2010

She's got great buns: Thumbprint Buns, that is.

Over the past few months, my part of Oz has been ridding itself of a drought that has been ongoing since 1995.  That’s why you can’t really resent the rain.  Or shouldn’t, not if you don’t want to be labelled shallow and callous.  But the sun actually came out the day before yesterday, and it was warm, and sunny, and I joyfully ventured forth into The Great Outdoors, ie. my backyard.

It turned out that my backyard has, alas, turned into an alien and hostile place, thanks to complete neglect over, ooh, say, five months or so.  I know, I know, but it’s been raining every single day, all right?  But all this would change, I vowed as I hacked my way through the undergrowth with a machete and waved at Tarzan as he swung by on a vine on his way home to Jane and Tarzan Jr.  There would once again be Lawn.  And the scent of herbs instead of dog poop in the air.  Tomorrow, I vowed, we would Clean Up the Backyard.

The next day, of course, it rained. 

But rather than resent the rain (see shallow and callous, above), I settled in for a rainy day timetable:  an old Hollywood musical (On the Town for the win!), the blanket I’m crocheting, and my younger son’s favourite jam buns.

Jools has been at me to make these for a while now, but I’ve neglected baking with yeast for a while, so he’s been missing out, but today was his day. 

These little buns, with their sweet jam centre, are reminiscent of thumbprint cookies, hence the name.  They are a great favourite with children, but don’t let that fool you:  they are delicate in texture and flavour, and very, very light, and will make the most demanding adult palate happy.  The dough is not too sweet, so as to be a good foil for that mother load of jam.

I like these jam buns warm, but be careful that they are not hot:  the jam filling when they come out of the oven is molten hot lava.

Recipe below.


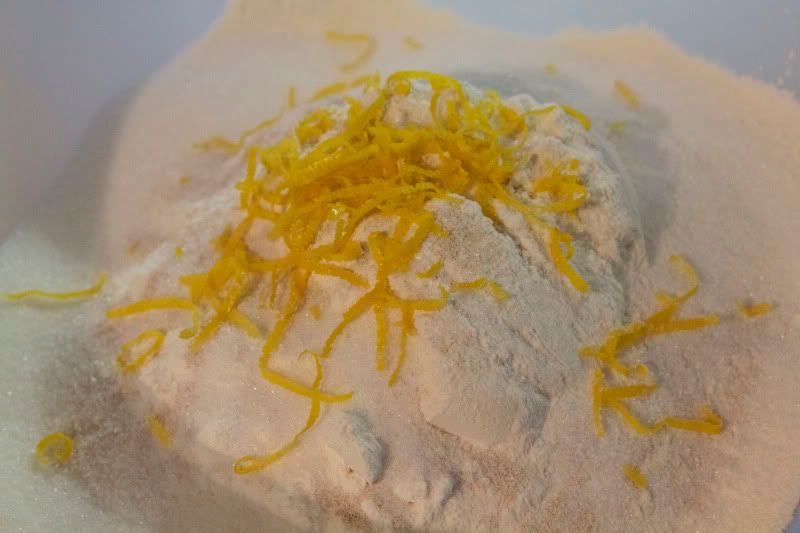
Despite the numerous pictures in this post, yeast baking is simple, and has been made infinitely more simple by instant yeast.  Honestly – I have no idea why compressed and fresh yeast even exist any more, let alone why anyone would buy them.  When using instant yeast, all you need do is add it to the dry ingredients – that’s it.


Whisk wet ingredients together.  This recipe calls for hot milk, but by the time you’ve whisked it with the remaining ingredients, it’ll be the right temperature for the yeast.


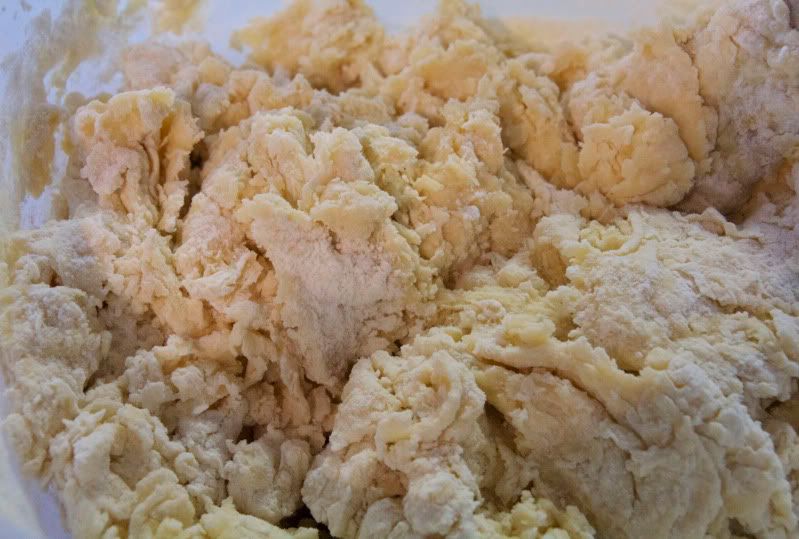
Add wet ingredients to dry, and stir with a wooden spoon until it just comes together.  If using an electric mixer, use the paddle or K attachment.


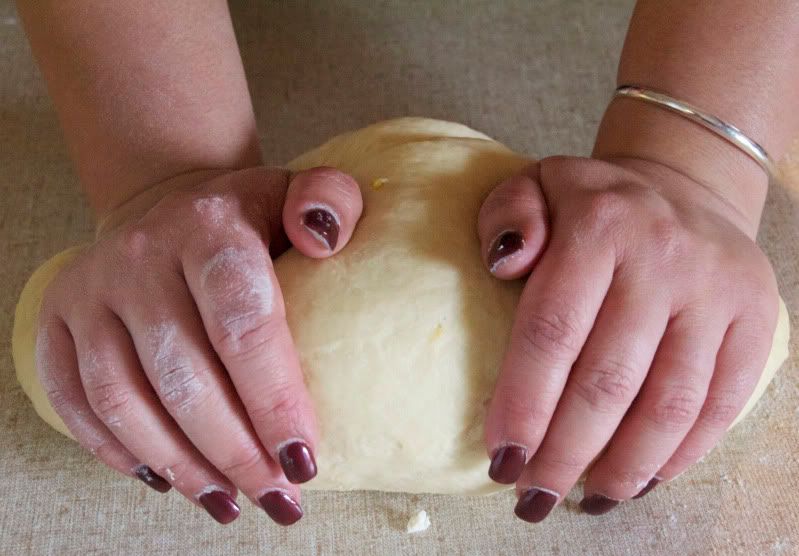
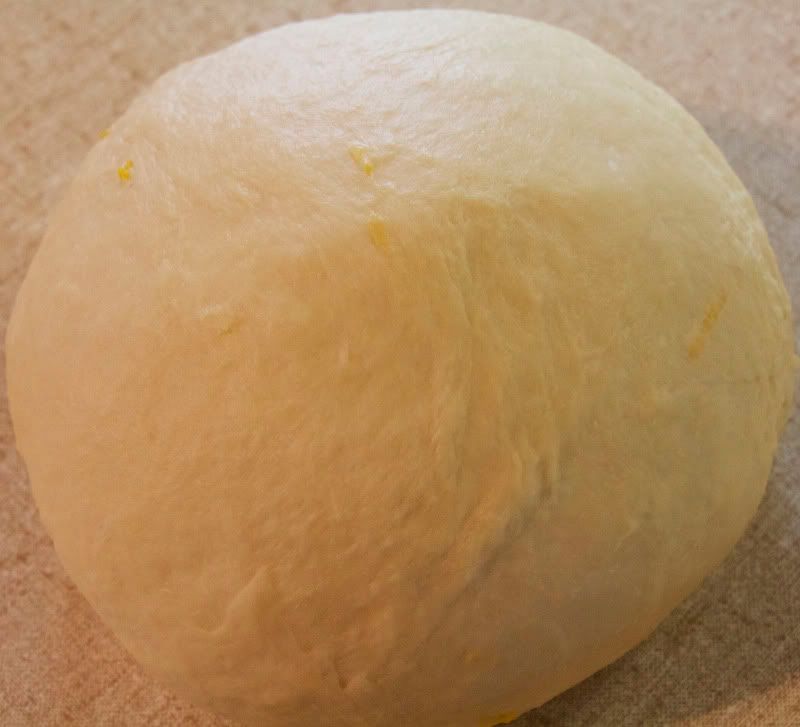
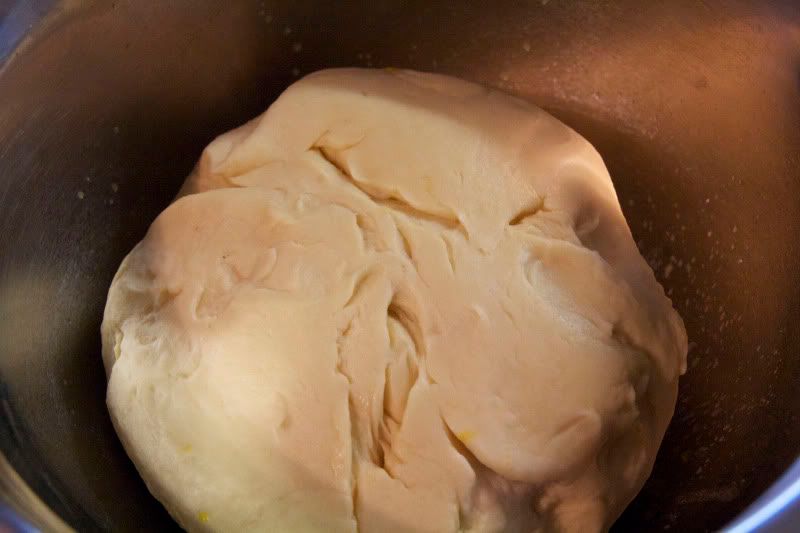
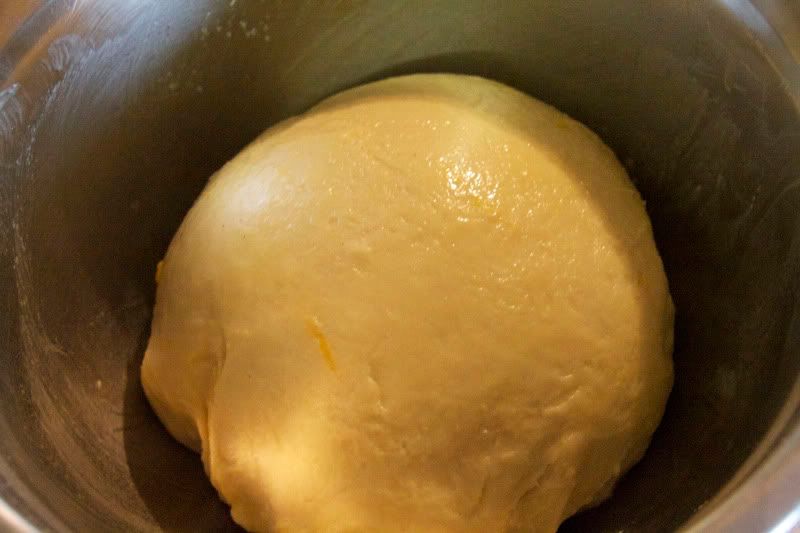
Turn your lumpy mixture onto a floured surface for the fun part:  kneading.  You’ll need to sprinkle the surface a couple of times with flour, but after a while it won’t stick to the surface any more.  If using a machine with dough hook, give it about 4-5 minutes, but if kneading by hand, give the dough 8 minutes by the clock.  There is a technique to kneading, but really, all you need to do is develop the gluten, and all that requires is gumption, so whatever you do to the dough, don’t be gentle.  After the kneading time your dough will be elastic and springy and…


… smooth as my baby’s bottom.  I mean a baby’s bottom.  Ahem.


Time to rise the dough.  This has to be done in a greased bowl, and this is the easiest way to grease it.  Get a puddle of melted butter or oil in a bowl that will comfortably hold 2 1/2 times the volume of dough.


Put in the dough, smooth side down.  Grab the dough by the ugly side, and wipe the inside of the bowl with the smooth part of the dough, which is now coated in butter or oil.


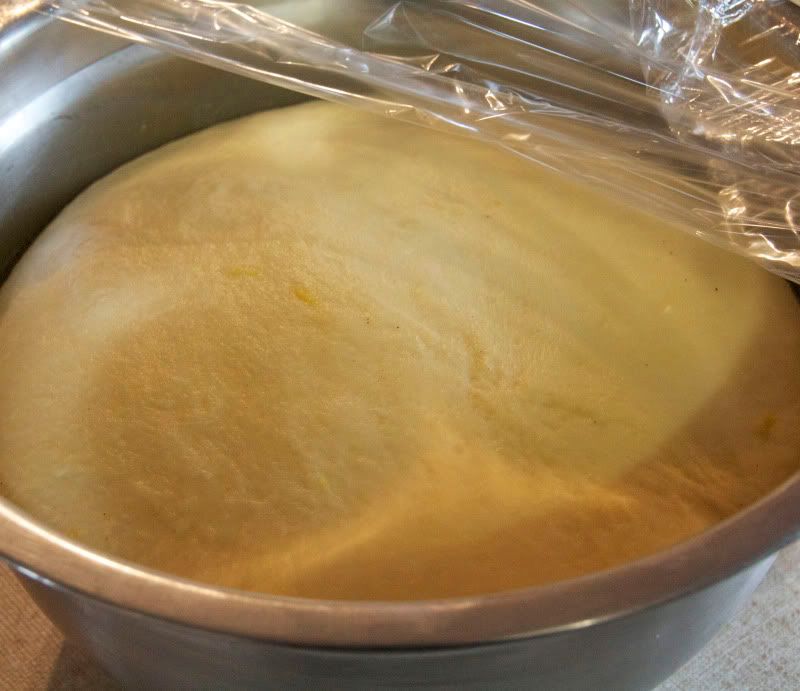
Flip the dough smooth side up again, cover with plastic wrap or floured cloth, and allow to rise in a warm place until doubled.


How long dough takes to rise depends on a few variables, but this batch took about an hour or so, in my oven which was just turned on.


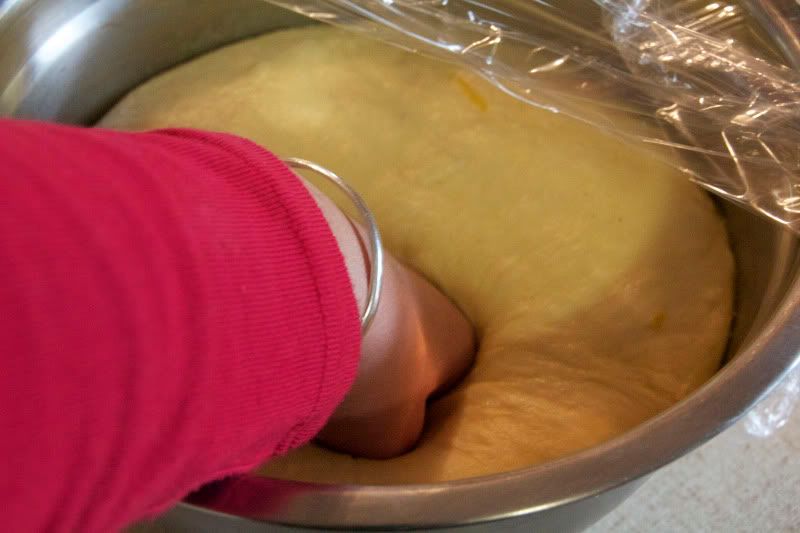
Knock (punch) the dough down.  Satisfying.  Divide the dough into 36 pieces, to make 36 buns.


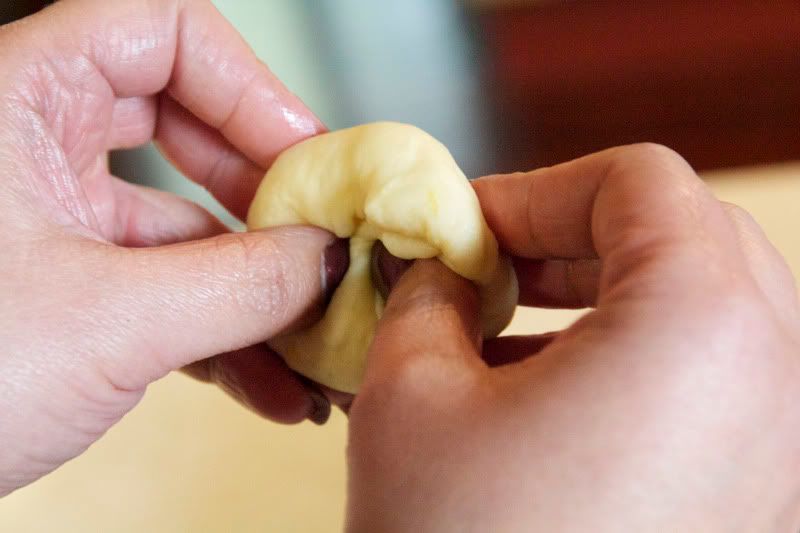
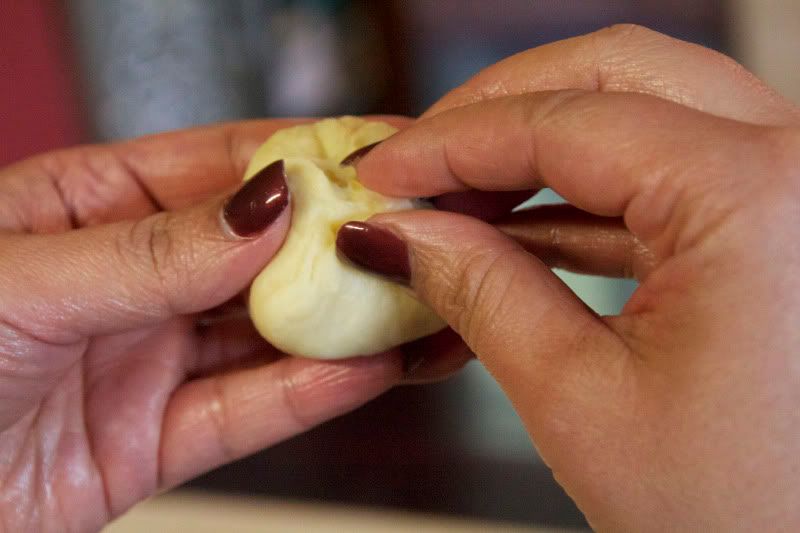
Now to form the buns.  This is my ma’s technique, which quickly and easily gives smooth tops, and I hope to be able to explain with a couple of pictures.  This is a folding technique.  You get a piece of dough, form into a rough ball, then basically smooth the top with your fingers while tucking it underneath with your thumbs.  Do this a few times.


Pinch the bottom closed.


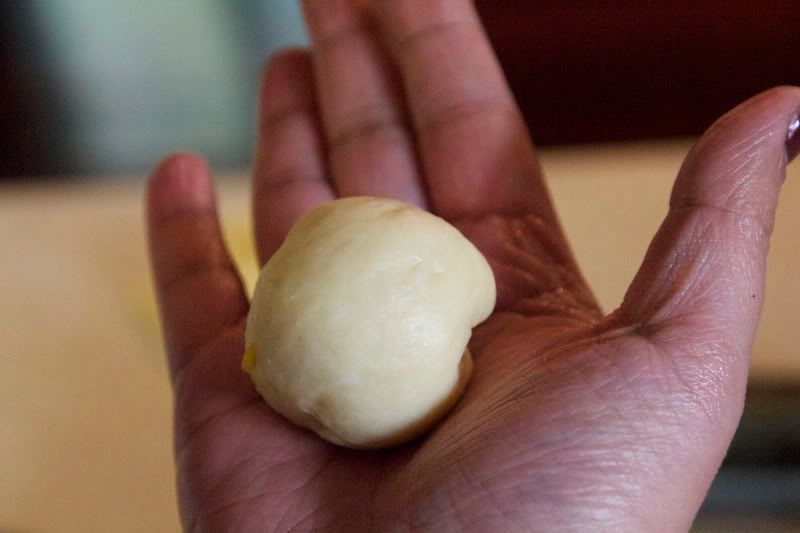
You’ll now have a smooth ballish shape.  Shape a little more with cupped hands if you like.


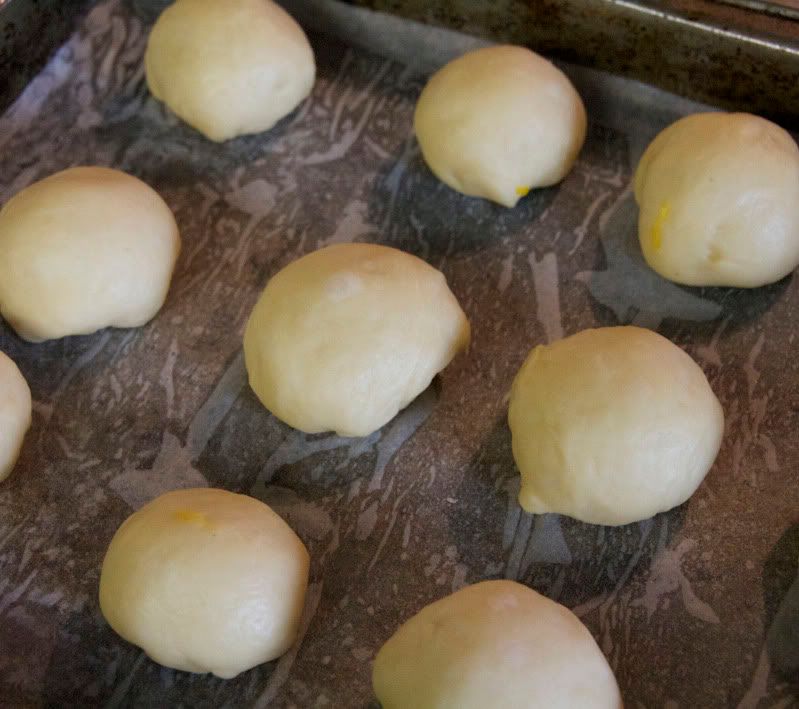
Place on greased or parchment-covered pans and allow to prove until almost doubled.  Now – this is important:  NEVER allow shaped breads and rolls to completely double before baking.  Yeasted goods continue rising when you put them in the oven (“ovenspring”), and if your rolls are already doubled they’ll overrise… and then go flat.  Flat in a yeasted item is not good:  it means overfermented, hard, dry, and crumbly.  Three-quarters of the way to doubled is about right.


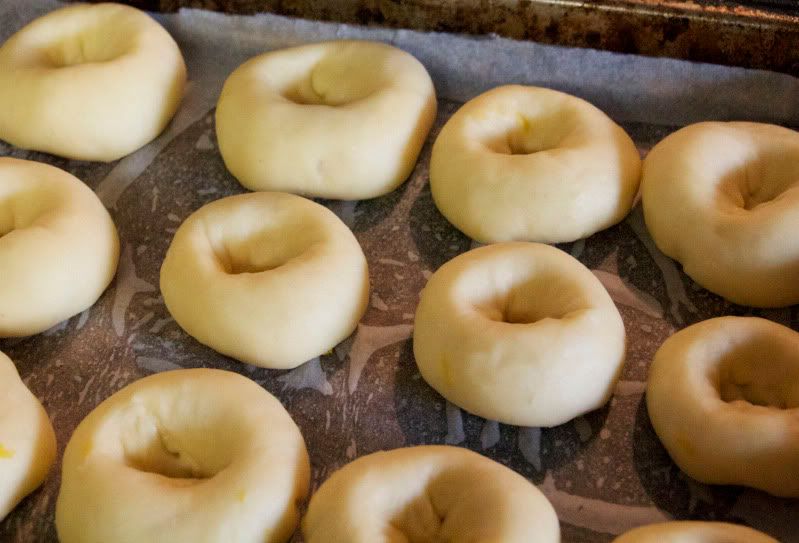
More fun:  make deep indentations with your thumb in each bun, brush with egg white


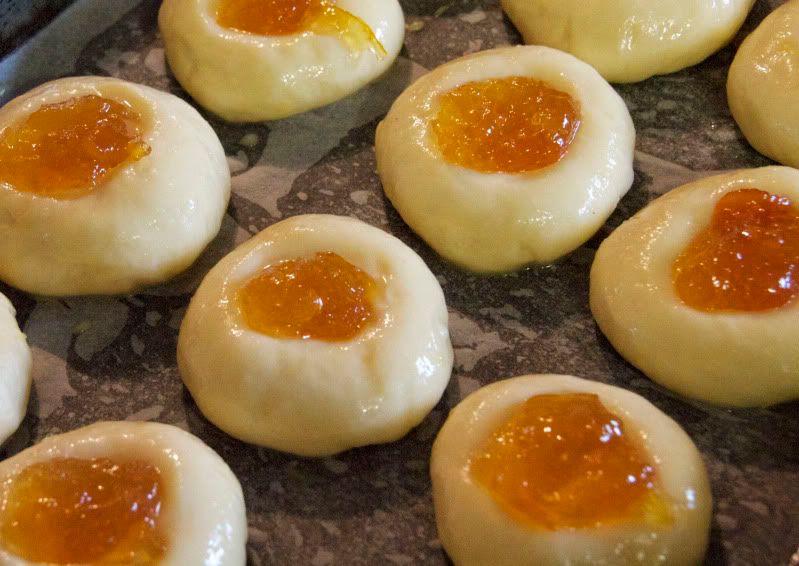
… and fill each one with a teaspoon of jam.  Raspberry in these…


… and homemade Seville marmalade in these.


Bake in a hot oven for 10-15 minutes until golden.


Tempting, but don’t touch just yet.  Remember:  molten hot lava.


Cool to warm and eat.  Two at least, with a glass of milk.  Yumbo McGillicutty!


THUMBPRINT BUNS
Makes 36 buns

Ingredients:
5 cups strong unbleached flour
3 tsp. instant yeast
1/2 cup sugar
1 1/2 tsp. salt
grated zest of 1 lemon
1 cup plain nonfat yoghurt
1 cup hot milk
1/2 cup melted butter
2 eggs, separated
Jam, desired flavour

What you do:
1. Combine flour, yeast, sugar, salt, and lemon zest in a large bowl.
2. Whisk together the yoghurt, milk, butter, and egg yolks. Add to dry ingredients, and stir to combine. Knead by hand for 8 minutes, or by machine with  dough hook for approximately 5 minutes, until smooth and elastic. Put dough in a greased bowl, cover with oiled cling film, and allow to rise until doubled.
3. Knock down dough, and divide in three equal portions. Roll each portion to form a thick sausage, and cut each sausage in 12. Shape pieces into smooth balls, and place on lightly greased baking pans, about 2 in (5 cm) apart.
4. With your thumb, make deep depressions into the centre of each bun. Brush buns with beaten egg white, and fill depression with about 1 tsp. jam. Allow buns to prove until almost doubled, then bake in a 200oC oven for 10-15 min., until golden.
Friday, September 24, 2010

Recycling Fridays: Schmaltz and Grieben OR Choose Your Guilt – How to Render Chicken Fat

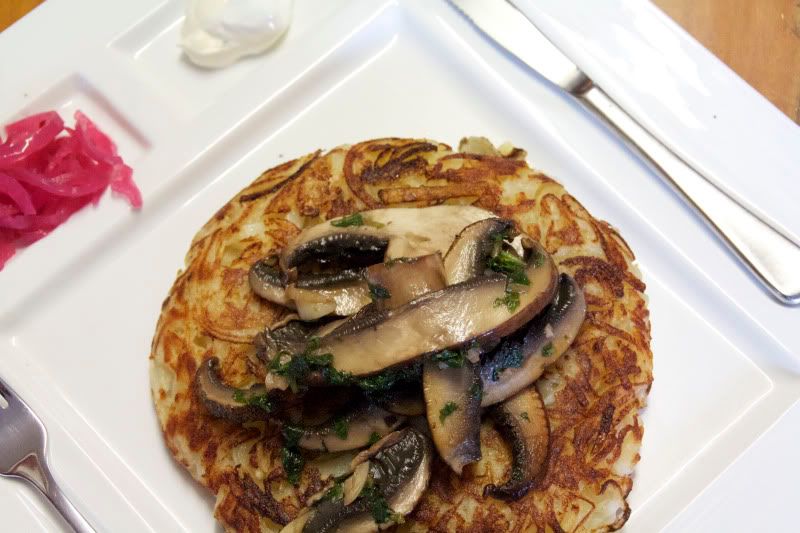
My Birthday Lunch for One, featuring potato pancake cooked in chicken fat, garlic Portobello mushrooms,  and my daughter's pickled red onions.
Yumbo McGillicutty!


If you’re inclined to guilt, you can’t win with chicken skin and trimmed fat.  You’re either going to feel guilty about throwing it away, or guilty about eating it.  But if you’re both adult-minded and care about food, common sense will tell you that you can include it in a balanced diet without fear of heart attacks or exploding gall bladders, and also make absolutely delicious, lip-smacking dishes with a flavour that, let’s face it, vegetable oil can’t replicate.

Despite the first title of the blog, it’s not just the Jewish that prize chicken fat.  The cuisines that use chicken fat are many, particularly in cultures where every bit of the animal is used.  Chinese cooks, for example, skim the fat off chicken stock to use later on in stir-fries.  The French appear not to have cottoned on to chicken fat, but that’s because they’ve had geese and ducks to fall back on, so to speak.  Same principle.  But while many of us will rhapsodise over potatoes roasted in goose fat, we’ve forgotten that the humble chicken can provide us with similar results, and at a fraction of the price, without horrible additives.

Rendering your own chicken fat is dead easy and will give you two things to use:  the fat (schmaltz) and the cracklings (grieben).  The grieben, as the late Laurie Colwin said in one of my favourite books, Home Cooking, “must be terrible for you because they are so extremely delicious”.  Grieben are a true delicacy, and any that you don’t swipe straight out of the pan elevate sautéed green vegetables into the very stratosphere of yumminess.

And then there’s the fat.  Yes, it’s saturated.  But my adult mind assumes that you’re not going to eat this stuff every day.  Furthermore, Laurie Colwin’s trick is a beauty: 

“… if you clutch your breast at the thought of all that saturation, a combination of chicken fat and vegetable oil works perfectly.  You can also kid yourself that while the chicken fat is coating your arteries, the polyunsaturates in the vegetable oil are cleaning them out.”

It’s what I did for My Birthday Lunch, above.  Chicken fat for flavour and crunch, and vegetable oil to reduce the damage.

Chicken fat can be used like any fat:  to shorten a dough or pastry (which will make it rather fine), and of course, to sauté and fry.  Like all animal fats, it adds loads of flavour, and that’s a bonus, because it means that you don’t need to use much to get the benefits.

So here is how to render your own chicken fat and also get that great by-product, grieben.


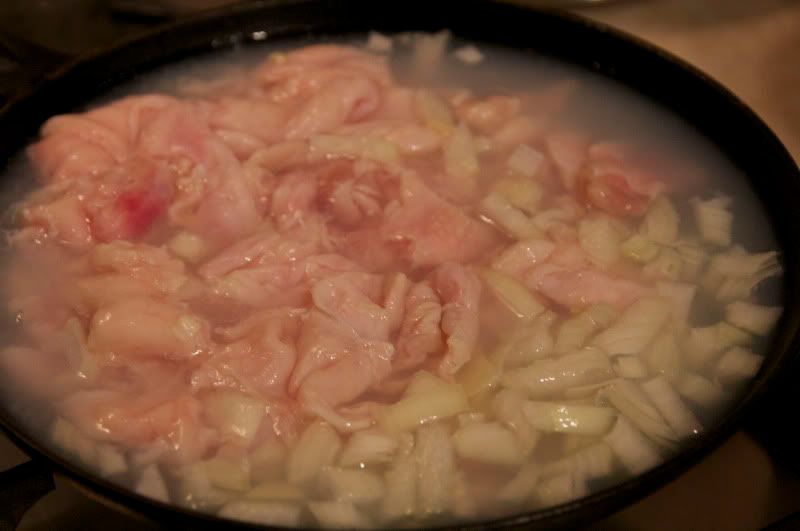
You can render fat either from chicken skin or from other parts of the chook; the area around the bum usually has a substantial fat deposit.  Sigh... ain't that the truth!  I have here the skin from nine chicken breasts.  Now - it's not worth embarking on this process without a goodly amount of trimmings, but you may not have the opportunity to work with chickens in bulk, so I would suggest that you drop all your skins and trimmed fat into a ziploc baggie in the freezer, and just keep adding to it until you have enough.


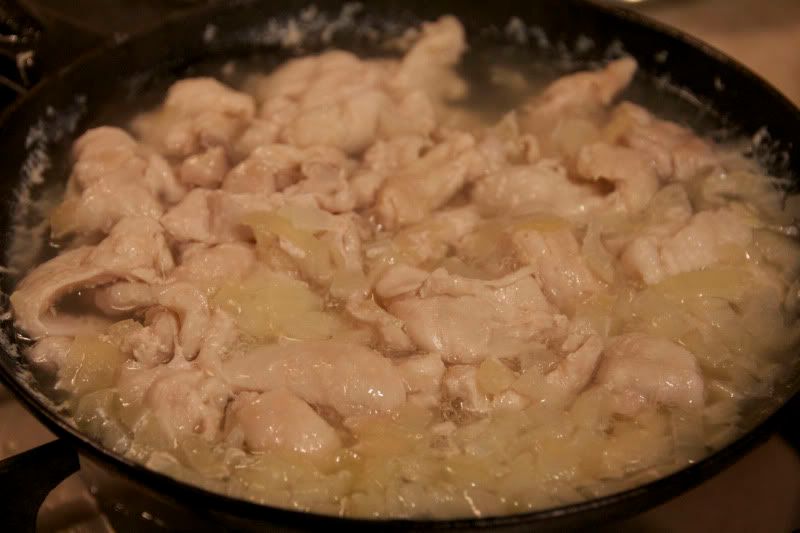
Place the chopped or julienned chook bits and a finely chopped onion in a frying pan with just enough water to cover.  I'm using this small cast iron pan which I cannot throw away despite it long ago having lost its handle.  I've had it 25 years and it's just the thing for this kind of thing.  Put the lid on, and cook over medium heat for about ten minutes.  This will make the fat begin to render out gently, which will give you the greatest volume.


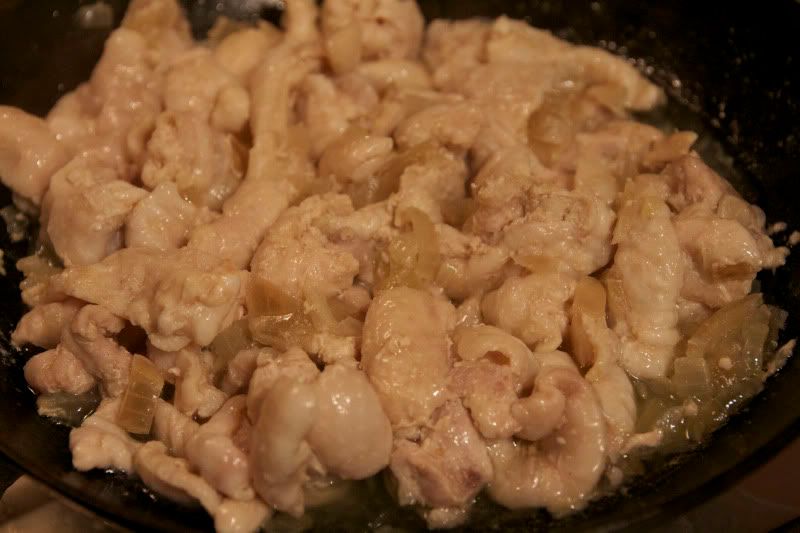
Remove the lid, and allow to simmer.  You'll be wanting this liquid to evaporate.  How long?  It takes as long as it takes.


Now is the time to listen.  As soon as you begin to hear sizzling, your first batch of fat is ready.  Strain solids in a fine mesh sieve over a bowl.  This fat is, according to cooks who know their schmaltz, the finest and most delicate, and good enough to eat on bread if you're bent that way.  You can  keep this fat separate from the subsequent batch, but I didn't.  I didn't think my palate or the palates of the people I cook for would be able to tell the difference.


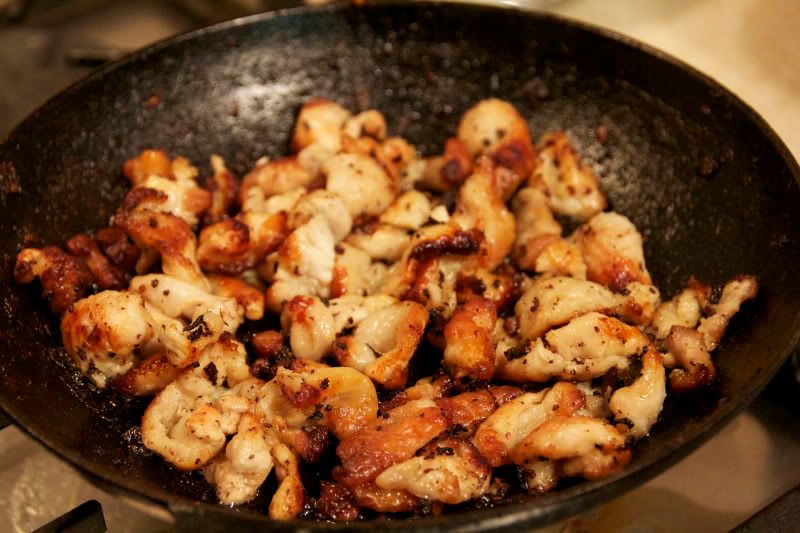
Return the solids to the pan and increase the heat a bit.  Cook steadily, stirring often, until the solids are golden and crunchy.  Now is the time to practice self restraint, because you'll begin to have fantasies of salting them and taking them to the living room to munch on while you watch TV.


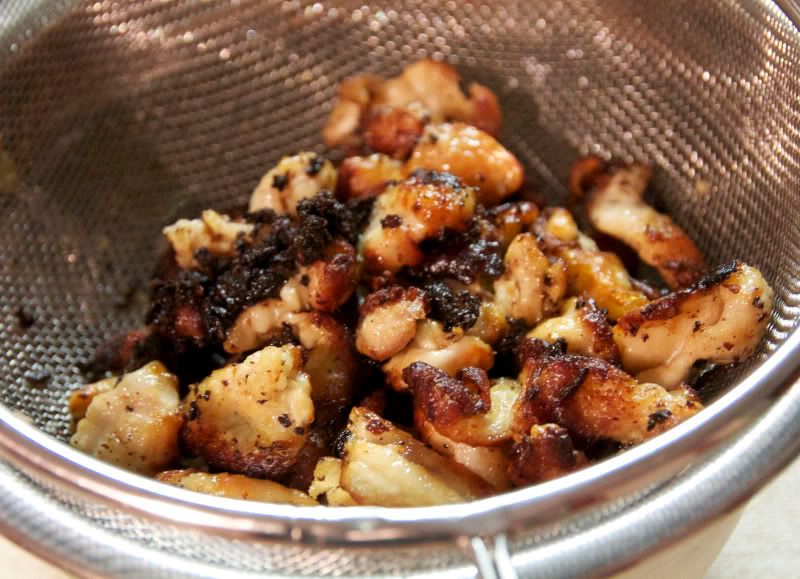
Once again, strain solids in a fine mesh sieve over a bowl.  Refrigerate both chicken fat and cracklings, tightly covered.  The cracklings will keep for a few days, and the fat will keep for 3-4 weeks in the 'fridge.  You can also, of course, freeze both.


Grieben are brilliant added to just about any vegetable you care to sauté or roast.  This broccoli was scarfed down, and I had to fight to have leftovers for my lunch the next day.


Chicken fat works like any fat, but my favourite use, hands down, is for frying potatoes.  They crunch up and have incomparable flavour.  I made this very immoderate potato pancake for my Birthday Lunch for One.  To make it, I used chicken fat and vegetable oil, half and half, and silently blessed Laurie Colwin as I ate.  She did, after all, say:

"It is silly to pretend that potato pancakes are dietetic or that they are good for you.  If you are going to enjoy them, approach them as a rare delicacy, throw caution to the wind and have a good time."

Wednesday, September 22, 2010

Don't be mean with the beans, mum

It’s not heartening when you tell your husband that you’re having baked beans on toast for dinner and he counters by offering to make dinner reservations.

But OK, let’s give the man a break.  As a husband, he’s pretty new, without benefit of the common-law marriage prior to moving in, so he wasn’t to know that I wasn’t going to open up a can of Heinz’s best to dump on top of some poor unsuspecting piece of toast.

Heinz’s best, by the way, are something I despise, despite their iconic status.  No icon can take my attention away from the fact that what I’m eating is slimy, slippery, and much too sweet in altogether the wrong way.  (There is a right way for something to be too sweet – baklava, for example.  But more on this another time.)  Plus the “tomato” flavour is nothing like what a real tomato – even a tinned real tomato – tastes like.  That’s why I put together this recipe many years ago.  They’re not Boston baked beans, largely because I’m not a huge fan of the predominant molasses flavour, but they were my answer to Heinz for a daughter who really, really loved her beans on toast for breakfast and afternoon meal (she stopped eating lunch in high school and would be ravenous when she got home).  I added some brown sugar for a hint of molasses and sweetness, and went to town on the seasoning.  Who Heinz?

Back when I had a houseful of children, I would make twice the amount below and freeze leftovers in single portions in paper cups.  One of these takes about two minutes to thaw and warm through in the mikey; convenience food at its best.  Last night, we had them on beautiful sourdough rye toast and smoked cheddar, and they were still convenient.  Despite the long cooking time, during which the house was the best-smelling house on the street, dinner was on the table in a couple of minutes.

My husband wolfed down his plateful and apologised for ever doubting me.  And then I had him apologise a couple more times, just because he’s such a new husband that I can get away with this kind of thing for now.  


STICKY BAKED BEANS
These baked beans don’t need the pork, and will still be delicious and sticky without it.  And by the way, if you haven’t made my beautiful sweet chilli sauce yet and are looking for a way to use the bottle of commercial stuff you still have, this is the perfect recipe for it. (Serves 6)

Ingredients: 
1 tbsp. oil
2 onions, finely chopped
2 stalks celery, or green peppers (capsicum), finely diced
2 cups water or stock
3 tbsp. prepared mustard (I like these tablespoons to be heaped)
1 1/2 tsp. salt or to taste
1 cup tomato passata
2 tbsp. tomato paste
1/4 cup sweet chili sauce
1/4 cup brown sugar
1 tbsp. Worcestershire sauce
4 cups cooked, but al dente, beans – I used a mixture of black turtle beans and four-bean mix (tinned are ok if you must, but rinse before using, and understand that there is a risk they will go mushy)
1 ham hock OR several bacon bones OR 250g. bacon in the piece(opt.)

What you do: 
1. Preheat oven to 160oC.  Heat oil in a frying pan. Add onions and celery or peppers, and cook for about 10 min., stirring occasionally, until onions are lightly browned
2.  While the veggies are cooking, whisk together the water or stock, mustard, salt, tomato passata and paste, sweet chili sauce, brown sugar, and Worcestershire sauce.
3.  Combine beans and veggies in casserole with a tight-fitting lid, and stir in sauce mixture.  Bury the ham hock, bacon bones or bacon in the middle. Cover casserole, and bake 3-4 hours, removing the lid for the last hour of cooking.  Beans should be tender, thick, and slightly sticky. You can remove bacon or ham hock and set aside for another use, or chop and add to beans.


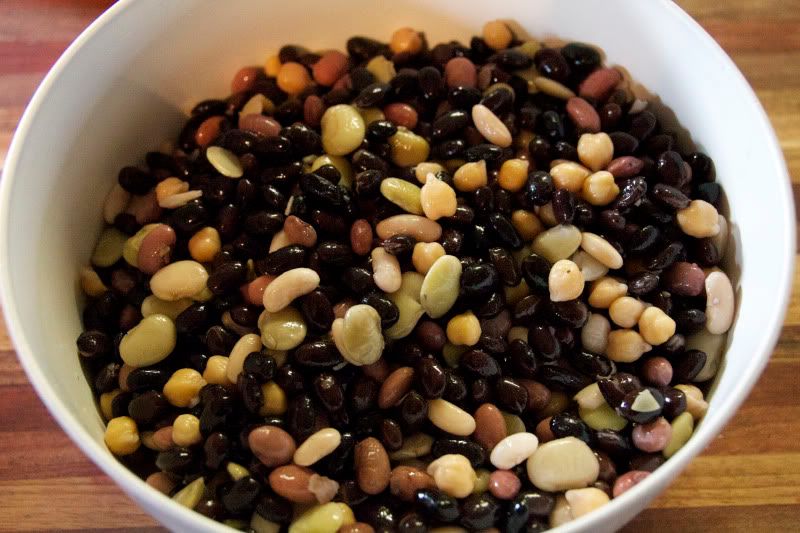
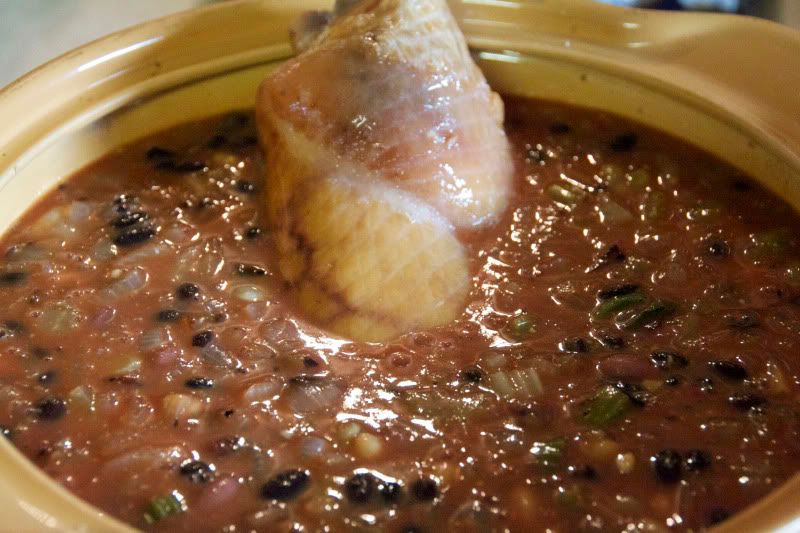
Here are the soaked and pre-cooked beans.  They are still quite al dente.  This will prevent mushiness in the finished dish.
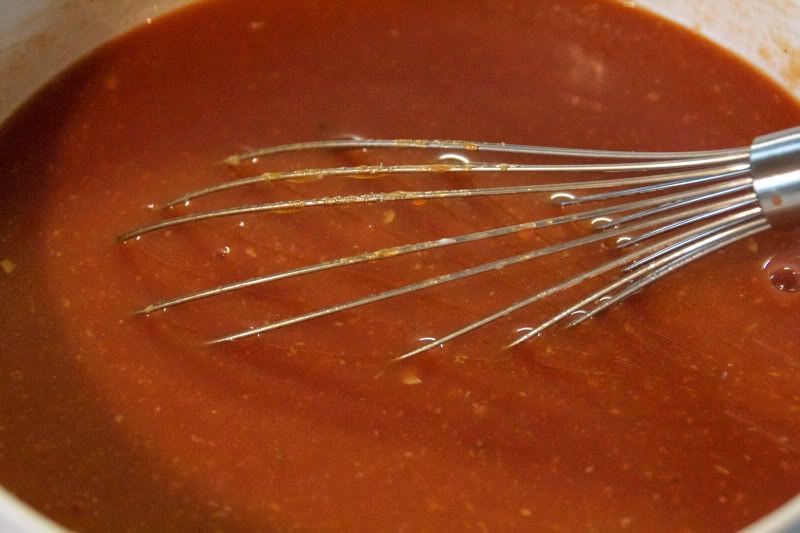
Yes, the sauce mixture looks Heinzey when you put it together, but it comes good in the end.

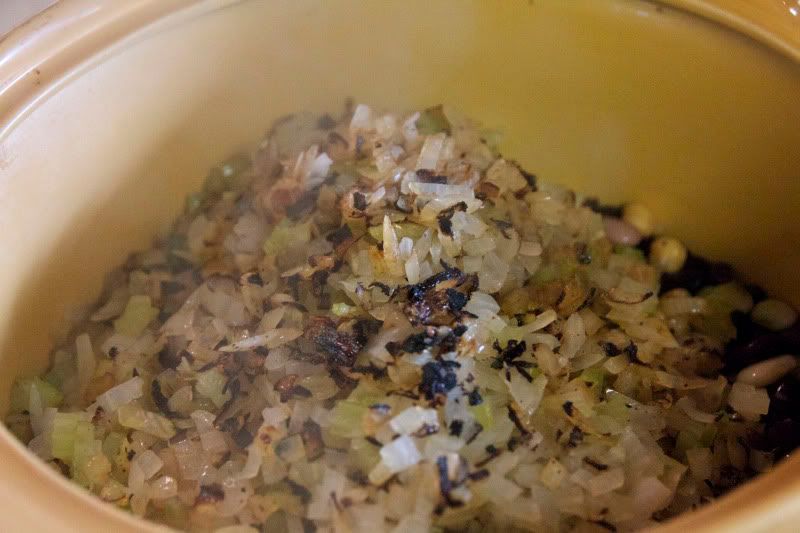
Add the sautéed veggies to the beans.  I like to let my veg catch and scorch just a bit.  It adds depth and flavour to the sauce.

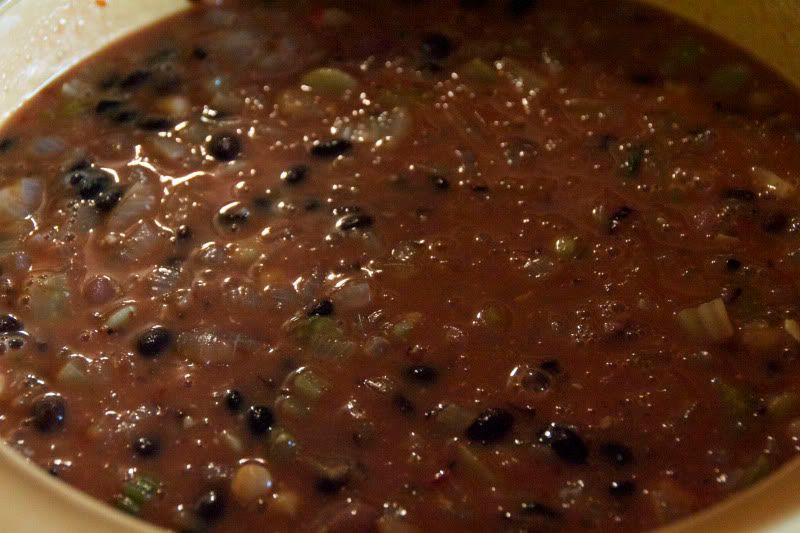
Add the sauce mixture to the beans and veg.  

If using the ham hock or bone, bury it in the middle.  By the way, you're not imagining it:  this is a huge casserole.  I doubled the recipe on purpose to have leftovers to freeze in individual portions in ziploc baggies.  

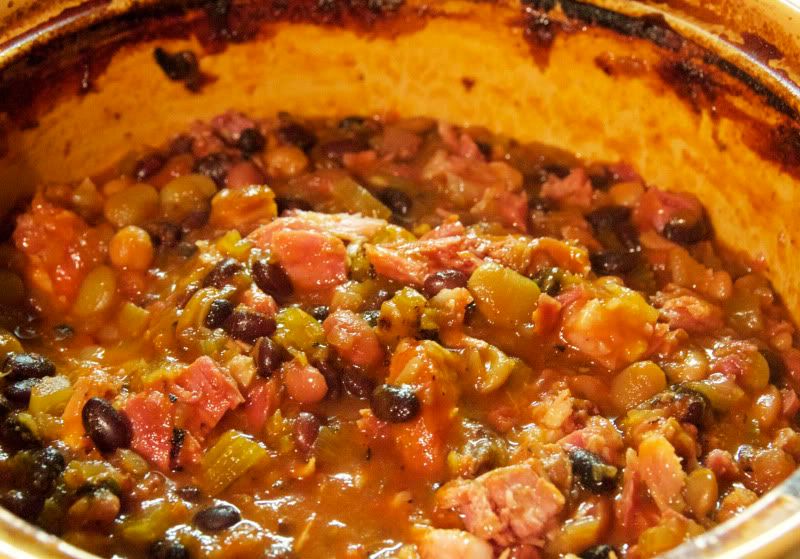
By the end of the cooking time, the mixture should be thick but the beans still plenty moist, with lots of sticky, but not runny, sauce.  Remove the meat from the ham, dice finely, and mix into the beans if you like (I do, and did).

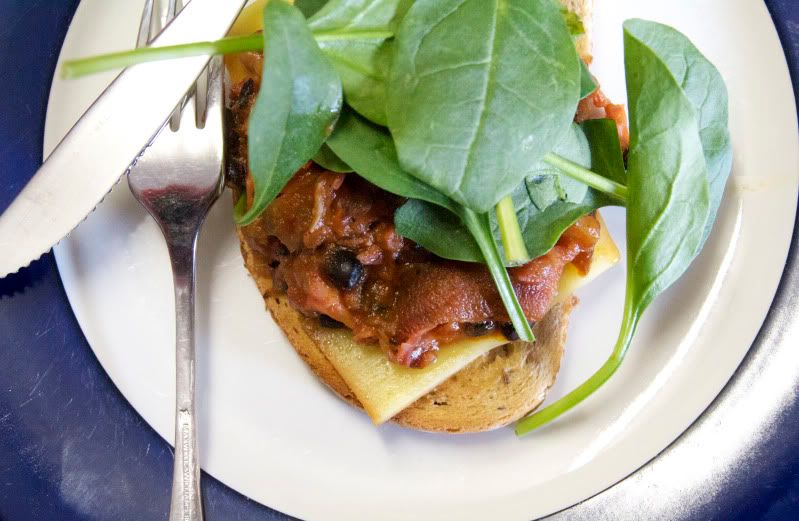
Here they are on hausbrot with smoked cheddar and spinach that will eventually wilt from the heat of the beans.
Yumbo McGillicutty!


Wednesday, September 1, 2010

The Best Damned Sweet Chili Sauce You Ever Had

I first bought “Sweet Chili Sauce for Chicken”, a product from Thai brand “Jinjia Taste”, about 25 years ago, and enjoyed the smugness that comes with discovering something like a great underground band:  I was in on a great secret, and I was its biggest fan.

But in the intervening years, sweet chili sauce has been discovered by just about everyone, and become as common as ketchup.  Unfortunately, what was once the underground band of the condiment world has sold out and isn’t playing pubs and clubs any more, but stadiums, and it barely has a spark of the fire it once had.  The quality has plummeted as its popularity has increased:  what was once slick and glazed is now gummy and gluggy, and what was a pleasant tingle on the tongue now gets your head cocked to one side as you struggle to place even a hint of spice on your palate.  You pick up a bottle to read the ingredients, and part of the reason why it’s so dire is clear:  first ingredient on the list is sugar, then water.  And because they don’t put in enough chili to thicken that miserable syrup up any, there’s xanthan gum to give it body.  Mmm-mmm good!

There are still some good quality sauces out there, but for the best sauce, you make your own.  This one is superb, with a deep garnet colour and layers of complex flavour that are heightened by the sweetness rather than overpowered by it, and, joy of joys, it is also one of the easiest, quickest preserves.  You can use it in anything you would normally use sweet chili sauce for, if you can stop yourself eating it with a spoon.


THE BEST DAMNED SWEET CHILI SAUCE YOU EVER HAD
(Makes about 2 cups)

Ingredients:
250g. red peppers (capsicum), roughly chopped (cored and seeded weight)
2 long red chilies, roughly chopped
6 cloves garlic, roughly chopped
1 tbsp. chopped lemongrass
1 tbsp. chopped ginger
1 tsp. dried crushed red chili (more or less - see note below)
stalks and roots from one bunch of coriander (cilantro)
2 tbsp. red wine vinegar
1 tbsp. salt
2 cups water
1 1/4 cup sugar

What you do:
1.  Combine all ingredients except sugar in a saucepan, and bring to the boil.  Cook at a steady boil for 5 minutes.  Add sugar, stir to dissolve, and bring to the boil again.  Reduce heat and cook at a high simmer, stirring occasionally, for 25 minutes.
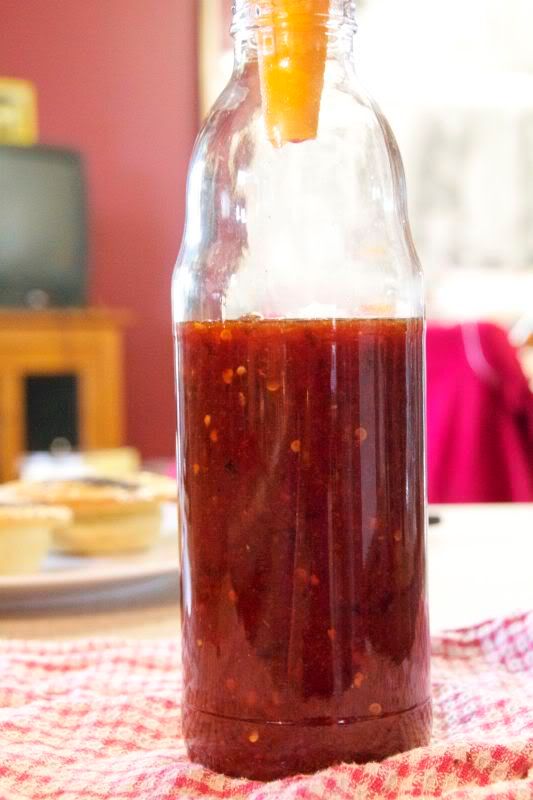
2.  Transfer contents of saucepan to food processor and whizz for about a minute, until smooth, thick, and glossy.  Pour into hot, sterilised bottles or jars, and seal.

Note:  The actual amount of dried chilli is up to you and depends on how hot you like your sweet chilli sauce, and the heat of the fresh chillies.  Chilies bought from the supermarket in Australia don’t often have a name, and you don’t really know what kind they are and how much heat they hold until you taste them at home (or try to remove your contact lens – hyeah, tell me about it).


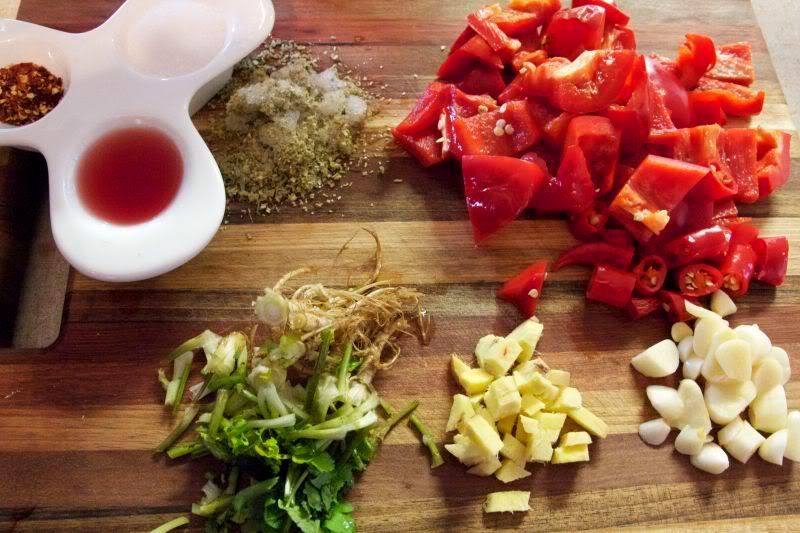
This sauce was a rescue mission for the red peppers which,
as you can see, wouldn't see another day.  And yes, that's
frost on the lemongrass:  I keep it in the freezer.  The
chilies too, hence the wrinkly skin.

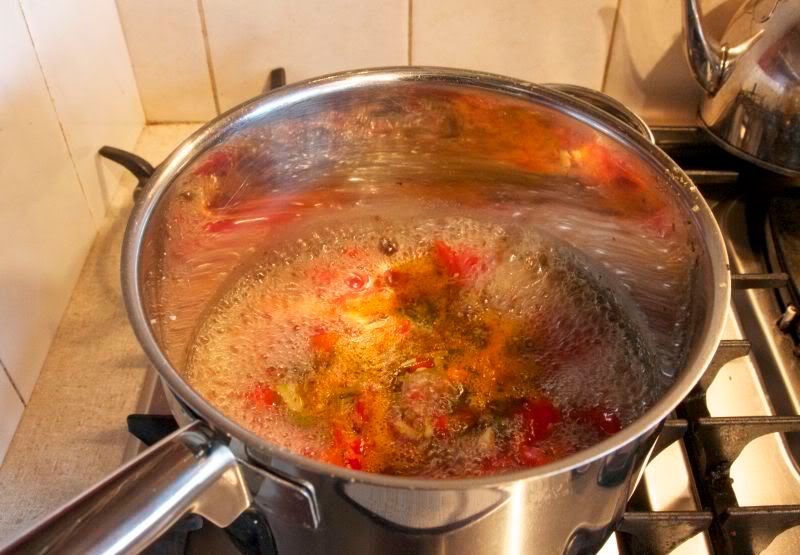
Have a look and keep in mind how the liquid looks before...


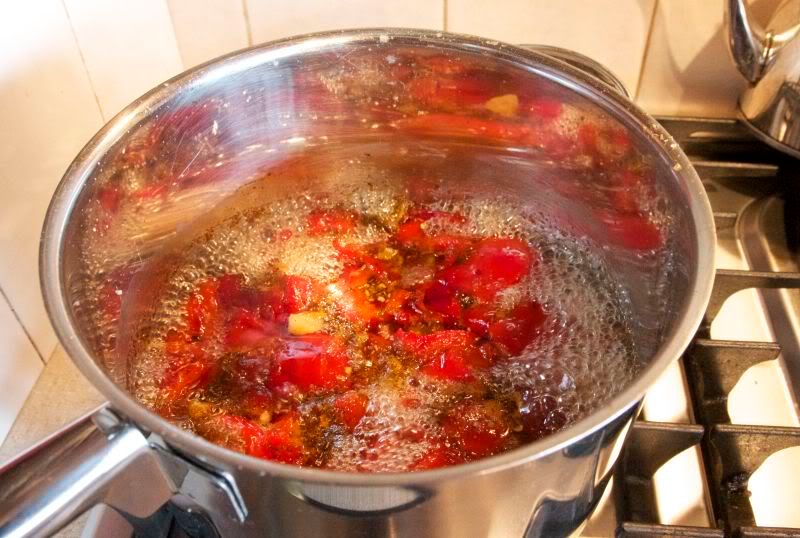
... the cooking time is up.  Liquids should be reduced and
syrupy, and veggies should look glazed.

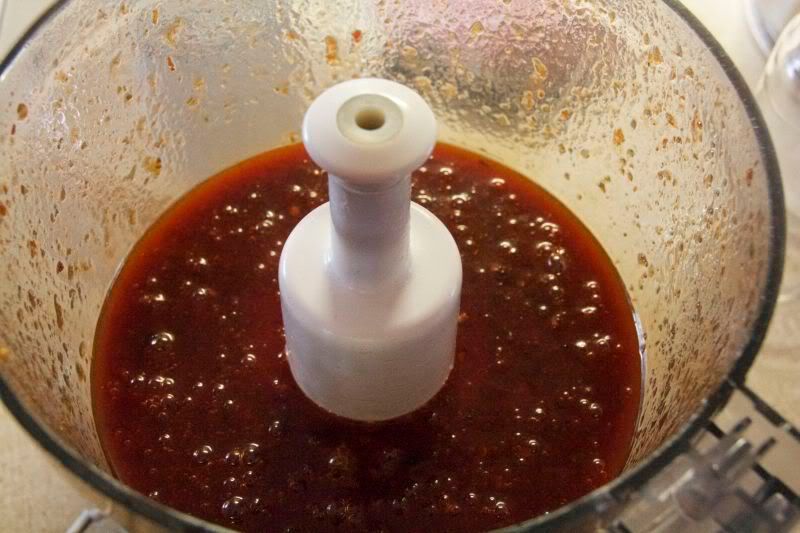
Give the whizzing a good minute.
It helps thicken the sauce.


After its burl in the food processor, your sauce should be
thick, garnet red, and glossy.

Pot 'er up.
Aroi mak mak!

Tuesday, August 31, 2010

Tarty Tuesdays: Soufflé Tomato Tart

Savoury tartas, tarts, are popular in Buenos Aires, where I was born.  Every cook has his or her own versions of the tart (my mother’s was an onion one to go on bended knee for) and no wonder:  a tart can be posh, a tart can be homely, a tart can use just about anything in the pantry, ‘fridge or freezer, and a tart can be one of the quickest things to put together, particularly if you pick up a packet of pastry discos from the cold case at the supermarket.

But most of all, a tart is simple.  It has just three components, so repeat them after me, and remember them, because while there will be recipes here and elsewhere, a savoury tart is something you don’t need a recipe for:

- Base
- Filling
- Binding for the filling

The base is easy.  It can be pastry, bought or homemade, but it can also be thin slices of sturdy vegetables like fried eggplant, or a cooked rice crust, or just about anything you can think of that will hold a filling.

The filling is the main flavour of your tart.  What’s in the pantry?  A tin of tuna?  Sauté an onion, add that sucker to the pan with some chopped pimento, pepper, and paprika, and you have a classic.  What’s in the vegetable crisper?  Zucchini?  Fry them up with onion and oregano, and layer them with mozzarella over the base.  Leftovers in the ‘fridge?  Chop them up and mix them with your binding with additional seasonings and maybe some cheese, and diners won’t know that you’re showing them a rerun.

The binding is also easy although sorry, vegan friends, to get a filling that will hold together properly when cut, you need egg.  And sure not all fillings are meant to hold together, but when they’re not, I suggest a pie, instead.  Beaten egg - you don't need many, just two or three - can be poured over the filling, or you can beat those eggs together with milk or cream for a wobblier, more custardy filling.  That same filling will become feather light if, like in this recipe, you beat the egg whites first.

So give a tart a try.  What’s the worst that can happen?  Your filling won’t set?  Give everyone your best, most dazzling smile, and a spoon.

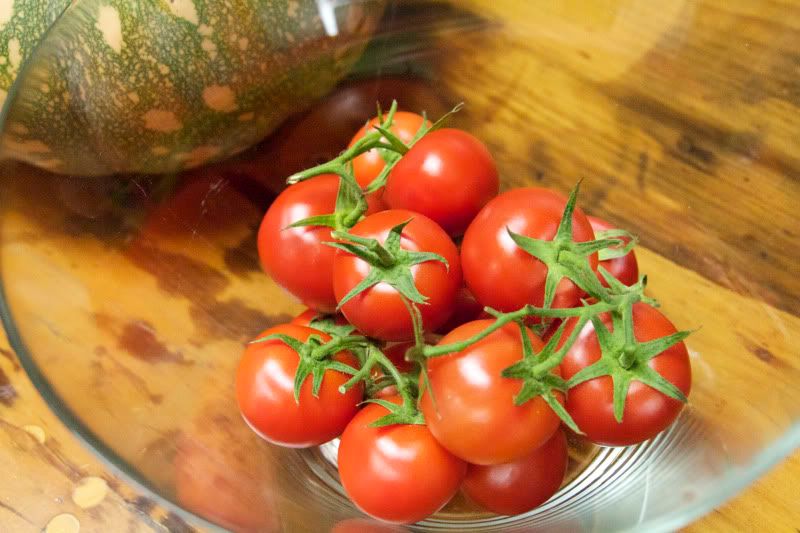
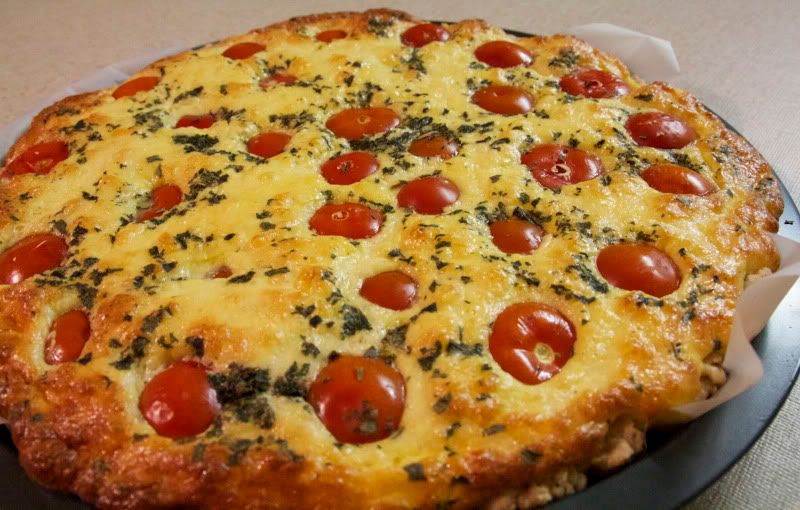
In the meantime, though, here is a recipe for one of our favourites:  soufflé tomato tart.  It smells, looks, and tastes divine, for very little effort.  The only caveat is that it is so simple that for it to be divine you must make it with beautiful ripe tomatoes that actually smell and taste like proper tomatoes.  I found these gorgeous little things at my local greengrocer and actually came to a screeching halt in front of them because smack in the middle of our southern hemisphere winter on a howling cold day, they smelt like summer.  I rushed them home and put the tart together in about half an hour, homemade pastry included, and we were eating it about half an hour after that.

Perfect 'matas


SOUFFLE TOMATO TART

Ingredients:
Pastry to line tart/flan pan, bought or homemade (see below for Fatima’s ready-in-two-minutes crust)
1 kg. gorgeous ripe tomatoes, or as many as you need for the inside of your pan
1 cup proper egg mayonnaise or cream
3 eggs, separated
200g. cheddar (white cheddar in the US) or Swiss cheese, grated
2 tbsp. grated Parmesan cheese
salt and pepper to taste
Fresh herbs (opt.)

What you do:
1.  Preheat oven to 180oC.  Line tart/flan pan with pastry and allow to rest while making filling.  (If making Fatima’s crust, make it and line the pan with it before beating egg whites.  It’s best made just before baking.)
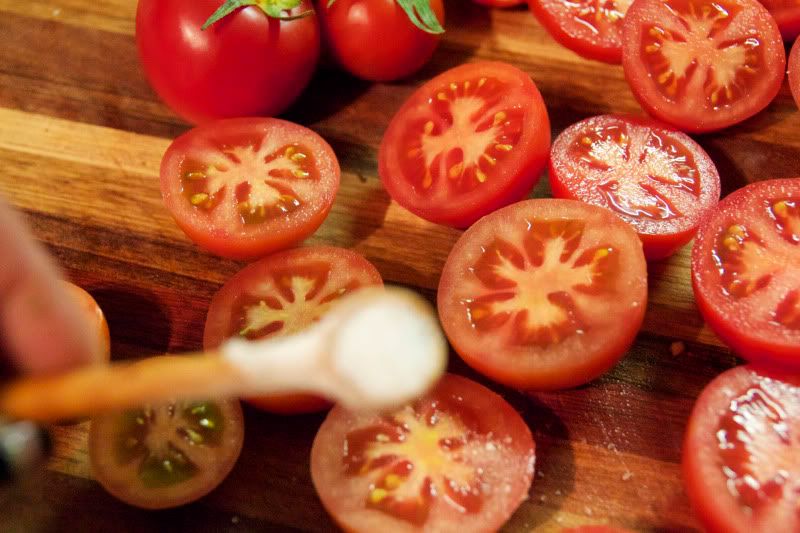
2.  Halve tomatoes if small, or quarter them if large.  Sprinkle lightly with salt.
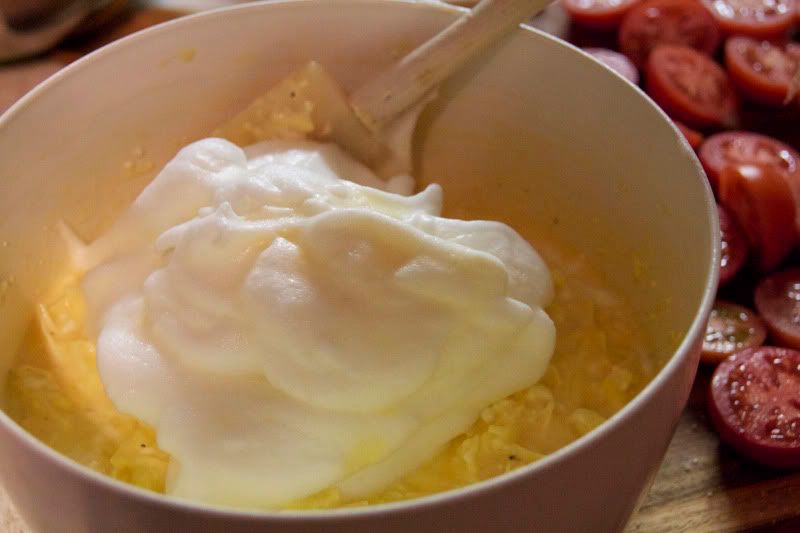
3.  To make filling, beat egg yolks with mayonnaise or cream.  Mix in cheeses, and salt and pepper to taste.  Beat egg whites until stiff, and fold into egg yolk mixture.
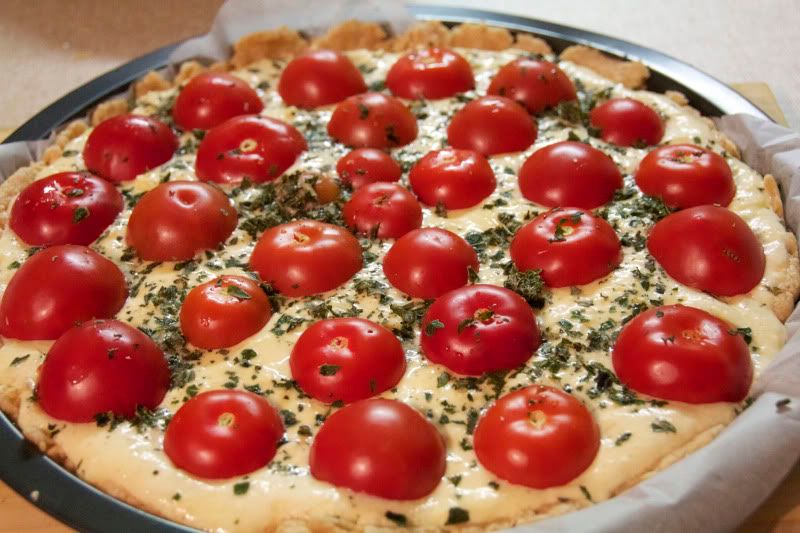
4.  Pour filling into pastry.  If using halved tomatoes, arrange them on the filling cut side down, and if using quartered tomatoes, arrange them prettily cut side up.  Sprinkle with chopped or torn herbs if using.  Bake for 35 min., or until set, risen and golden.  Serve hot (although cold leftovers for lunch the next day are FABULOUS).

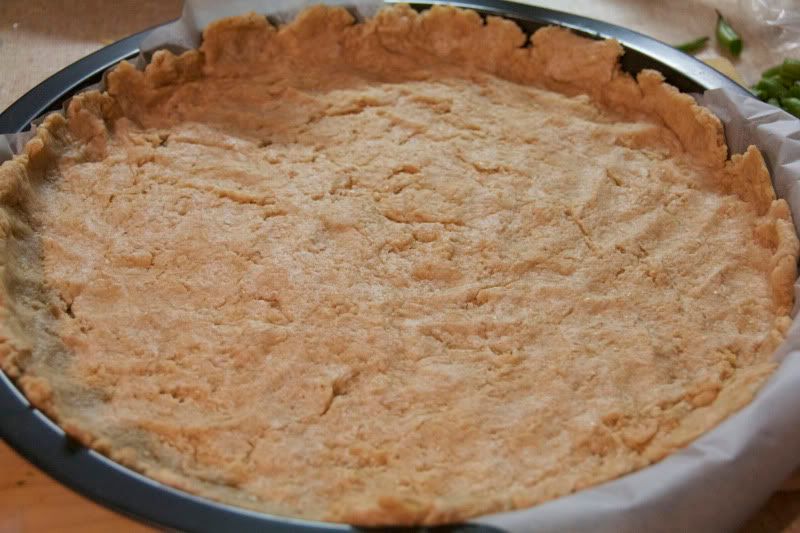
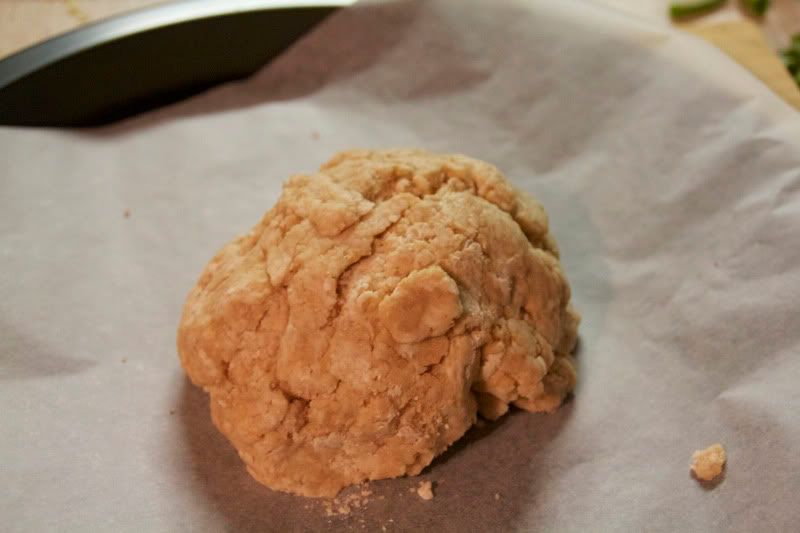
This is Fatima's easy crust, below.  I made it with
wholewheat flour, which made the guilt over all that cream,
cheese and egg yolks almost nonexistent.  My tart pan is
actually massive (I made 1 1/2 times the filling) and this
amount of pastry just lines it, hence no fancy crimping.

It's important to salt the tomatoes just before making
the filling, otherwise the salt will draw out too much of
the tomatoes' juices, making the filling sloppy.


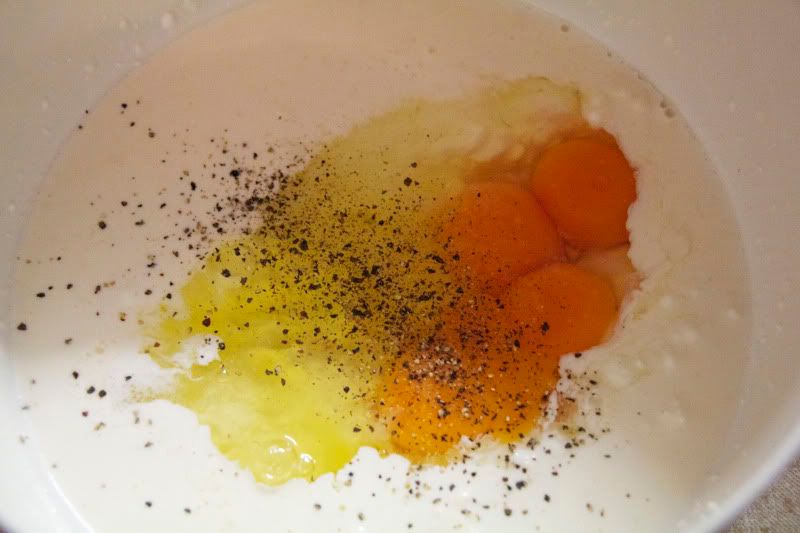
This filling includes a couple of whole eggs because
I had some extra egg whites that needed using.


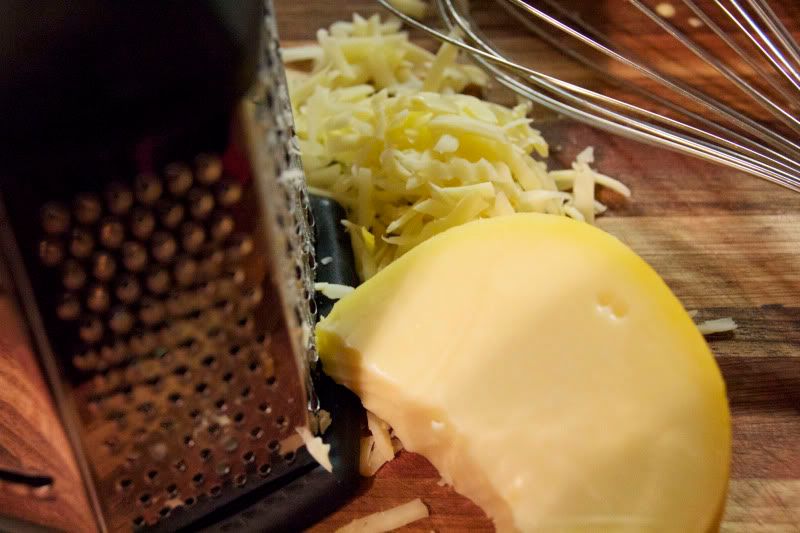
Repeat after me:  no Kraft!


Folding egg whites in will ensure soufflé success.


Sprinkled with fresh basil and ready to go in the oven.


The item in question.
Yumbo McGillicutty!

EASY TART CRUST – FROM FATIMA WITH LOVE
You can omit the baking powder, if you like, and use soda water instead of ordinary water for lightness.
Ingredients:
2 cups flour
1 tbsp. baking powder
1/2 cup vegetable oil
1/2 cup water

What you do:
1.  Combine dry ingredients in a bowl with a whisk.  Add wet ingredients and stir to form a ball.  Place ball of pastry on your pan, and spread out with your hands and fingers to cover the base and come up the sides.  (You can roll this pastry out, but I find it a bit of a pain unless it’s between two pieces of baking paper.) 

Unless there's Company, I don't bother with greasing my
pans and just spread a sheet of nonstick baking paper over
my pan before spreading it out with my fingers.
This batch was made with wholewheat flour.