"A person cooking is a person giving: Even the simplest food is a gift."

Laurie Colwin

Sunday, February 13, 2011

How to Never Celebrate Valentine's Day Ever Again OR How to Semi-cater Your Wedding

Valentine’s Day, that most innocuous of holidays, is loathed about as much as it is celebrated.  And to stop the bane of having to celebrate it ever again, I did something rather novel (albeit clichéd):  I got married on February 14.

That was a year ago.  A wondrous, terrifyingly happy and singularly tough year doing what I said I’d never do again, except that what makes it all the aforementioned things is that I actually haven’t done this before.  Despite previous marriages, it is, in a very real way, the first time for both of us.

My Baby proposed in November, and we were married the next February: a shotgun wedding without the baby.  There was, at this point in our lives, no point in either waiting or spending a fortune on a “fairy tale wedding” because, let’s face it, we’ve both been around the traps and know better than to believe in fairy tales or try to re-enact them (unless it’s Goldilocks because I will always insist on swiping some of whatever My Baby is eating).  So we decided on a very small, intimate wedding in the backyard, and because I am a hard case, I decided that a portion of it was to be home-made.

My sister and I always laugh at wedding articles that say stuff like, “Begin your wedding day with a relaxing massage…”  With our ma in charge, our weddings were total nervefests, completely self-catered with 12 courses, and her sewing up the last of the wedding dress hem an hour before we were supposed to be walking down the aisle.  Relaxation and weddings were not things we had hitherto believed go hand-in-hand.  Ma is still with me in spirit these days, but I didn’t want to do that again.  On the other hand, we had only had a few months to save up, and Shane and I wanted a fantastic honeymoon.  So budget we did.  Budget or no budget, however, Shane and I wanted to make our guests feel welcome, and we wanted them well-fed, relaxed, and happy.  The solution was to let the caterer cater some, and let Vibey cater some.  Which I did, to the cries of one friend who exclaimed, “Are you insane?  On your wedding day you’re supposed to relax!  Have a massage!...”

OK so I didn’t have a massage on my wedding day.  But I didn’t cook, either.  I made some things the day before, bought the rest, and on the day, entrusted a fantastic caterer to provide a colourful and dramatic main course.  Once my dress was on, and my oldest friend had said, “Right?  You sure you want to go through with this?  The car’s running if you want to run away!” I did relax.  We had a beautiful day.  Who knew you could have a good time at your own wedding?  Not me.  Our guests were also relaxed and had a lovely time, and some of them said it was the loveliest wedding they ever went to;  and all of them, a year later, still rave about the food.

So here is how to cater and not cater your non-Valentine’s celebration, at the same time.

All photos except gazpacho © Dee Sutton Photography 


First on the table was a couple of picada, or antipasto, platters.  It included honey and balsamic roasted pearl onions, marinated olives, marinated roasted peppers, caperberries, marinated mushrooms, cheeses, spicy salami, lots of crusty bread, and what is the world’s one perfect appetiser:  prosciutto and melon.  The night before, my daughter assembled bamboo skewers of cantaloupe cubes and folds of prosciutto.  If you do this ahead, you have to do what we did and make sure the prosciutto and melon don’t touch, otherwise the melon juices will make the ham soggy.
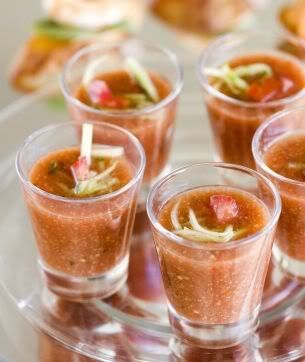


There are no pictures of the first course – this is a swiped one - and I don’t know why, but I suspect it’s because it was just devoured.  To keep with the theme of the main course, I bought 200 shot glasses (a bargain – thank you eBay), and filled half of them with gazpacho, and the other half with white gazpacho or ajo blanco (“white garlic”).  I have made a killer gazpacho for decades now, but was unprepared how my guests would receive the white gazpacho, which on ingredients alone – lots of garlic, almonds, bread, and a garnish of green grapes – may sound weird to some, but there were enraptured exclamations, and sighs, and grown women licking out the insides of the shot glasses.  This behaviour was probably encouraged by the jugs of sangria that were on offer.  It is a colleague’s recipe and a killer, and because it was a warm day guests were quaffing down great glasses of it and saying, “There isn’t much alcohol in this, is there?”


My piece de résistance was the caterer, Wadey, from The Paella Pan catering. 
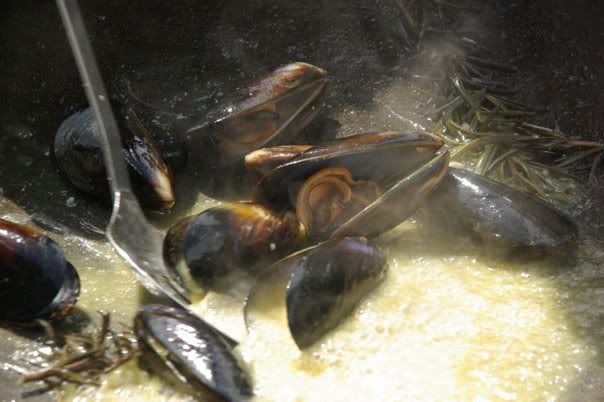


Everyone loves paella (not to mention risotto, which he also cooked), but the genius of it was the anticipation.  Wadey has these massive gas-fired pans that he uses to cook in front of assembled guests, and he doesn’t need to be showy.  The increasing suspense of the ingredients as he added them one by one, and the accompanying aromas, were drama enough.
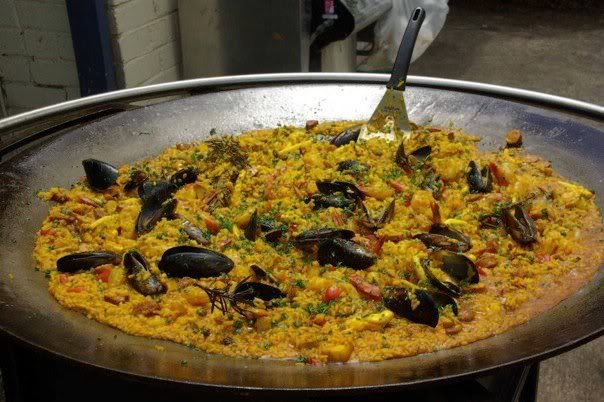


Wadey made a classic “paella extreme”…
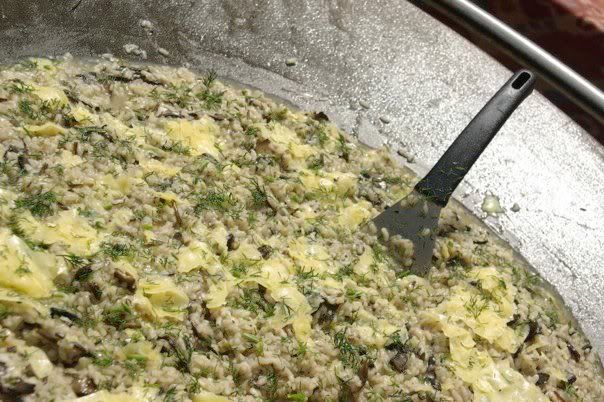


… and a wild mushroom and wild rice risotto.  There was a gorgeous salad with spanking fresh leaves and feta.  Wadey provides disposable plates.  Did we care about the lack of china?  Heck, no.  Everyone was rhapsodising about the deliciousness of it all, and there was less cleanup.
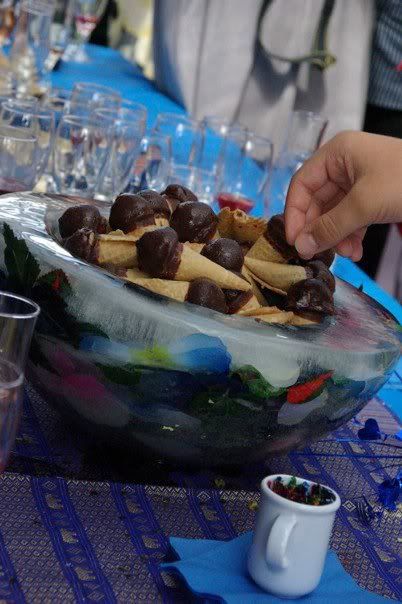


Dessert was delightful, and fine enough that everyone was asking me if I’d made these myself.  No, they were Bellantis, purchased from Aldi:  miniature ice-cream cones filled with good-quality ice cream and covered in dark Belgian chocolate.  I put these in a stunning ice bowl that I had made the week before.  Making your own ice bowl is the easiest thing in the world to do, and instructions on how to do it abound on the Internet, but funnily enough, it’s not something you much see these days.  Despite my fears that the artificial flowers I’d trapped in the ice would make the bowl look tacky, it didn’t, and it kept the Bellantis from melting. 
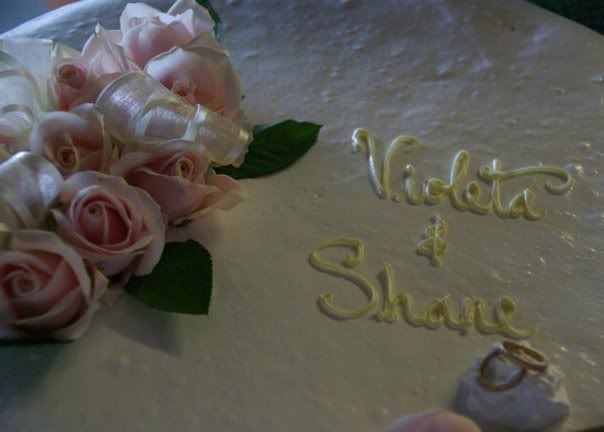


And so on to the cake.  I admire cake decorators beyond words, but I really wasn’t interested in a lookin’ cake, I wanted an eatin’ cake, and I wanted something that My Baby would love.  Marciano's Cakes, a Chilean pâtissier, makes a cake called La Rica, which has the tastes of my childhood.  Lighter-than-light vanilla sponge filled with dulce de leche (or as the Chileans call it, manjar), peaches and strawberries, and iced with the one icing I will go on bended knee for:  Italian meringue.  I asked for the decoration to be as simple as possible, and just as well, because there was a minor mishap and a portion of the icing got kinda… destroyed, but at that point I was past caring.  We were all so happy, so relaxed, and I knew the cake would taste divine, so I just shrugged.  My sister went into the garden, picked an overblown rose, sat it on the cake where icing should be, and that was that.
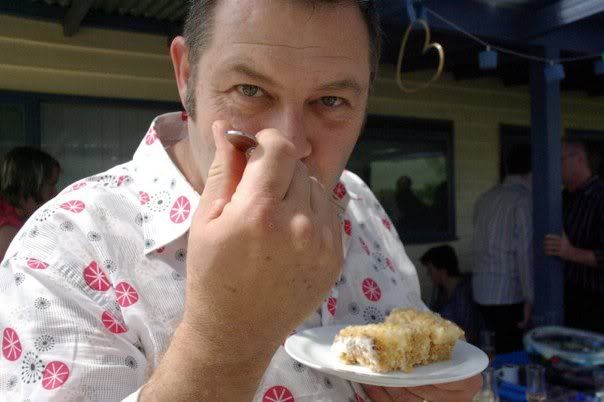


My Baby loved it.  And as I watched him enjoy our wedding cake, it occurred to me that I get to look into these amazing eyes for the rest of my life.  And no Valentine’s Day sentiment can compare with that.


MY GAZPACHO
(Serves 6, or fills 50 shot glasses)

I have tasted many gazpachos in my life, but none can compare to this one.  It is the best.  This isn’t a boast (particularly since it isn’t my original recipe, just a hand-down), it’s just fact.  It is flavourful and zingy, with lots of chewy interest.

Ingredients:
2 slices white bread
3 tbsp. red wine vinegar
2 tbsp. extra-virgin olive oil
3 cloves garlic
1 red or salad onion, roughly chopped
1 litre (4 cups) tomato juice
4 tomatoes, peeled, seeded, and finely chopped
3 Lebanese cucumbers, finely chopped
1 green pepper (capsicum), cored, seeded, and finely chopped
1 red pepper (capsicum), cored, seeded, and finely chopped
4 spring onions (scallions), finely sliced
1/2 bunch parsley, finely chopped
Salt and freshly ground pepper, to taste
Red wine vinegar and extra-virgin olive oil, extra, to serve

What you do:
1.  Tear bread into rough pieces and put into food processor with vinegar, oil, garlic, and onion.  Whizz until smooth.  You may need to add a little of the tomato juice to allow it to process well.  Put mixture into a large clean bowl.
2.  Stir in all remaining ingredients, cover, and refrigerate until very well chilled.  Taste, and correct seasoning:  chilled savoury foods sometimes need to be seasoned a little more highly.  Ladle into glass cups or glasses, floating a little extra vinegar and oil on top to serve.  Serve immediately.


WHITEY'S SANGRIA
Here's the recipe for the sangría we had at the wedding for the non-teetotalers.  It's from my ex-colleague and friend Andrew White, who is not only a gun but can cook like a demon. It's a far cry from my ma's, which used to just have wine, sugar, and orange and lemon juices, and packs a serious punch. I added orange juice, but Andrew doesn't; it doesn't matter, it's a flexible recipe. You can even remove the liquor and make it with non-alcoholic wine, which would be good for me because I’m one of the teetotalers, alas.

Ingredients:
1 bottle red wine
1/2 cup sugar
1/3 cup triple sec
1/3 cup rum
1/4 cup brandy
A few glugs of vodka (opt.)
Juice of 1 orange
Fruit (we had peaches, grapes - both of which are essential to me - strawberries, and sliced lemon)
Lemonade or soda water
Ice
Lime or lemon wedges

What you do:
Combine the wine, sugar, triple sec, rum, brandy, vodka if using, orange juice, and fruit in a massive jug or bowl. Chill overnight. Next day, dilute with lemonade or soda (a ratio of 2/3 wine base to 1/3 lemonade or soda is about right), and add ice and lime or lemon wedges. Serve immediately.

Thursday, February 3, 2011

THE CAKE OF DELICIOUSNESS!


Have you ever bought something for a pittance, and then it turns out to be one of the best things you’ve ever bought?

It happened to me with Home Cooking, by Laurie Colwin.  I found it about twenty years ago on a bookshop’s remainder table for $2, and took it home.  Remainder tables prove either one of two things:  that a lot of crap gets published, or that book buyers are idiots.  As soon as I started reading Laurie Colwin’s book – a collection of essays dotted with recipes, written at a time when blogs did not exist – I knew that the point that had been proven was the latter. 

Colwin’s intimate, friendly tone pulled me into the book like an embrace, and I was hooked.  And continued to be hooked, for I read this book too many times to count in the twenty years that followed.  And I didn’t do it for the recipes, which I only ever cooked a few of.  Like other lovers of this book, I did it for the writing.  And I did it because the more I read it, the more she became my friend.  Opening the book was like entering her SoHo apartment, flinging my coat off, and having Laurie talk to me while she prepared something that, to paraphrase the woman, I didn’t know I wanted but was exactly what I wanted.  “Some books are like coming home,” said Gillian Armstrong’s Jo March, and this is exactly what I felt, which would have given Laurie Colwin a kick, because it’s exactly how she felt about old cookbooks.

What really sucks about Laurie Colwin is that she died too young.  And when I found out she did, I was devastated.  Moreover I found out that she was dead years after the fact – she died pre-Internet (at least Internet For Me), and the newspaper didn’t think her a writer worthy of enough note to write an obituary – so my grief was retrospective.  I think this would probably have given her a bit of a kick as well.  But at this time I learned why I loved her cookbooks so much:  they were her only non-fiction forays in what was a highly regarded (albeit cultish) career writing fiction.  The skill with which she created the tangible worlds in which her fiction took place was the same with which she created her paper kitchen.  I was not her only fan, and many of her fans would also consider her a friend, just as I did.

Shortly before she died, Laurie Colwin opened the door to her kitchen once more and published More Home Cooking:  A Writer Returns to the Kitchen.  So I bought it a couple of weeks ago and I’m reading it and laughing and getting a tear in my eye because with every word, I feel she’s telling me, “Welcome back!”  And I am glad to be back.  Once again it’s just Laurie and me, and she’s telling me about her life, and travels, and friends and family (many of whom have shared recipes for this book), and handing me a slice of this pie here, and all is well with the world.

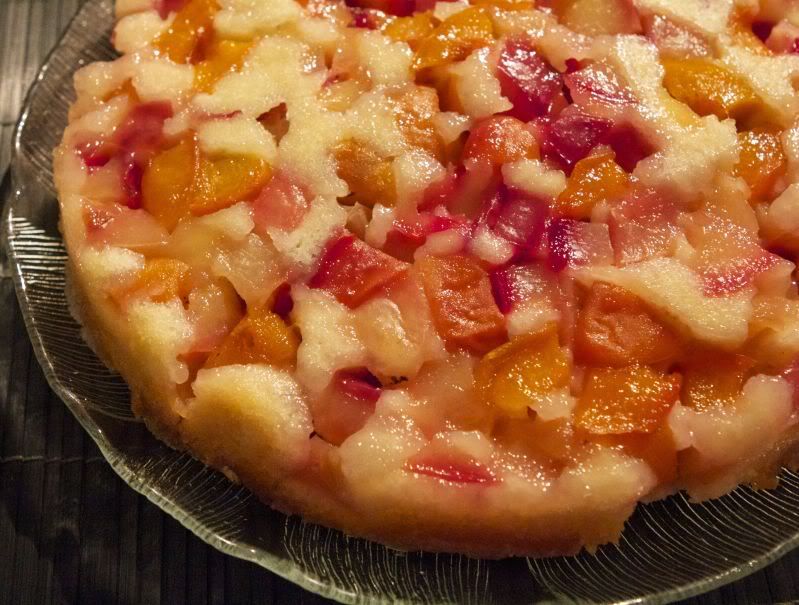
The pie in question isn’t a pie at all, she says, but a cake.  And it’s from Nantucket and made with cranberries, but mine is from Melbourne and made with ripe white nectarines and apricots.  And the original recipe isn’t from Laurie Colwin, but her friend Ann Gold, who got it from her mother, who doesn’t know where it originally came from.  This makes sense, because as Laurie Colwin herself said, without a cook giving another cook a friendly hint or two, the human race would have died out long ago.

So I had very, very ripe white nectarines and apricots to use up.  And I wanted something simple but delicious.  On top of it all, it had been a stinking hot day and although I was keen to bake something, I wanted no banging around, and for the oven to be on for the minimum time.  Laurie Colwin told me that she herself likes “a cake that takes about four seconds to put together and gives an ambrosial result”, and this was the recipe, which I adapted slightly (her recipe uses cranberries and walnuts, one less egg, and almond essence).  It was, as she said, a snap.

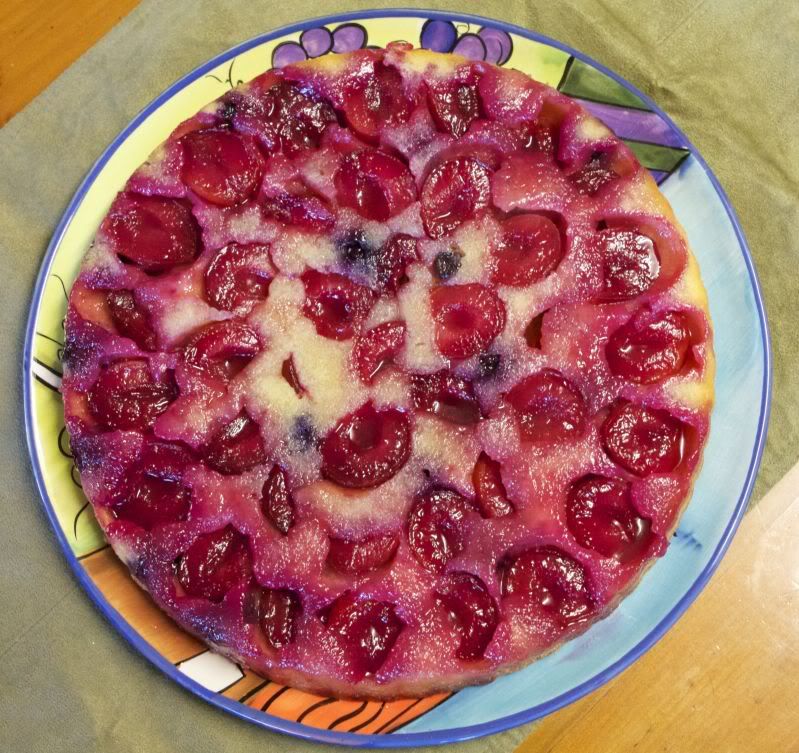
When I took it out of the oven, I sighed.  When I unmoulded it, I proclaimed myself a genius.  And when my eager Baby asked me what kind of a cake it was, I announced that it was The Cake of Deliciousness!  (To say this properly, you need a bit of Invader Zim megalomania and phrase it thus:  “THE CAKE!  OF!  DELICIOUSNESS!”)

Although cold leftovers were good the next day, this cake is best served warm or at room temperature, however you like.  Laurie Colwin advises:  “If you wanted to do some lily-gilding, you might put some vanilla ice cream (or crème fraîche or, if you have tons of time, custard) on the side, but Ann Gold serves it straight, which is, I feel, the best way.”

So do I.  Thanks, Laurie.  See you soon.


THE CAKE OF DELICIOUSNESS

Ingredients:
Soft fruit, as needed (see below)
1 1/2 cups sugar
3 eggs
3/4 cup melted butter
1 cup flour
1 tsp. vanilla essence

What you do:
1.  Preheat oven to 180oC.  Chop enough soft fruit to make 2 1/2 cups.  (Laurie Colwin says the charm of the dessert is the contrast of the tart berries with the “smooth, sweet, buttery cake”, but my white nectarines and apricots were sublime.)
2.  Butter a pie dish or cake pan, or brush with Baker's Secret, then sprinkle over 1/2 cup of the sugar.  Scatter fruit on top.
3.  Mix the eggs with the remaining sugar, butter, flour, and vanilla essence.  Stir until smooth – no need to beat.
4.  Pour batter – it will be thick – over fruit, spreading it carefully.  There will be a high fruit-to-batter ratio and this, my friends, is what makes this cake so spectacular.  Bake for 40 minutes, until set and just getting golden around the edges.  Allow to cool for 5-10 minutes, run a knife around the edge, and unmould upside down onto a pretty plate.  Announce that you are a genius and that this is THE CAKE!  OF!  DELICIOUSNESS! and serve warm or at room temperature.


Yumbo McGillicutty!

Wednesday, February 2, 2011

Aromatic Sweet Green Chili Sauce

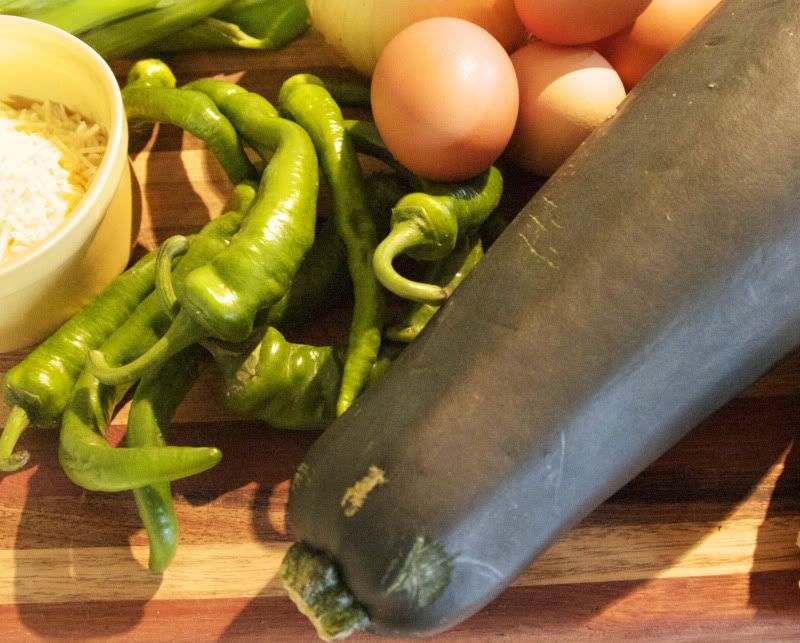
It’s like this at this time of year:  go to church, come back home with a marrow [squash] big enough to club a mastodon to death with.


Zucchini are not only famously (or notoriously) fertile, but they are also incredibly fast growing, and what’s a tender young zucchini before you go to bed will be a green behemoth in the morning.  So if you plant zucchini, it’s a given that you will be giving many of them away.  Not that I’m complaining, because you’ll be giving at least one to me, which I’ll stuff or turn into a slice of something yummy on a Tarty Tuesday.

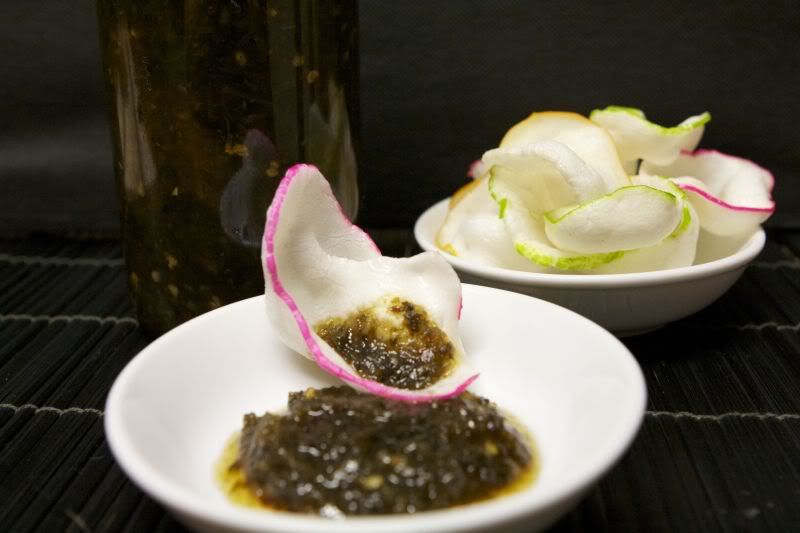
This Sunday, the obligatory box of summer garden produce included (along with the marrows) a bag full of the freshest green Cayenne chilies; so fresh they squeaked when they rubbed against each other.  I immediately - and before knowing what I’d do with them - took some generous handfuls home.  A few were used for pepping-up purposes here and there, but I finally decided that the rest would be used for a sauce along the lines of a sweet chilli sauce.  But as soon as all the ingredients came to the boil, I knew that I’d hit this one out of the ballpark.  It isn’t just a chili sauce:  it is an incredibly complex infusion of all your favourite Asian herbs and spices.  Like The Best Damned Sweet Chili Sauce You Ever Had, it is also a trice to make, and goes with too many things to mention, but the only thing I needed to eat it with the first time was a vehicle.  I chose garlic krupuk (which I always microwave, never fry), but honestly?  They were just so as not to admit to the indignity of wanting to eat it with a spoon.

You can use any long green chilies for this recipe, as long as you understand that you’ll then have to take responsibility for the heat of your sauce.  Green Cayenne chilies are very mild - mild enough to make a slightly peppy sauce that would appeal to children with sturdier palates - and the dried red chilli is entirely optional.  Or a starting point.  If this medium-spice sauce does not fit the bill of the asbestos-mouthed among you, feel free to add more. 


AROMATIC SWEET GREEN CHILI SAUCE

Ingredients:
250g. long green chilies (green Cayenne), topped and roughly chopped (keep seeds in), roughly sliced
2 whole bunches coriander (including roots and stalks), roughly chopped
1 cup (packed) fresh mint leaves
1 bulb garlic, cloves separated and peeled
1/4 cup (packed) Vietnamese mint
2 tbsp. chopped lemongrass
3 thick slices ginger
2 Kaffir lime leaves - fresh if you’ve got them (which I do - boast, boast)
1 tbsp. dried crushed red chili (opt.)
1 tsp. cumin seed
1 tsp. black mustard seed
2 tbsp. salt
3 1/2 cups water
1/3 cup white wine vinegar
2 3/4 cup sugar

What you do:
1.  Combine all ingredients except sugar in a saucepan, and bring to the boil.  Cook at a steady boil for 5 minutes.  Add sugar, stir to dissolve, and bring to the boil again.  Cook at a steady boil, stirring occasionally, for 25 minutes.
2.  Fish out Kaffir lime leaves and discard (oh, go on, lick them first).  Transfer remaining contents of saucepan to food processor and whizz for about a minute, until smooth and thick.  Pour into hot, sterilised bottles or jars, and seal.

Yumbo McGillicutty!

Tuesday, January 18, 2011

Tarty Tuesdays: ugly but good pie


I hadn’t seen my fake mother, Lee, since my wedding last Valentine’s Day.  Lee is still grieving – as is right and good – for the daughter who left this world just a week after that.  But her new home, with a 180o view of the sea just a stone’s throw away, is teeming with life, and that is also as it should be, because Lee and her husband, much as this loss has razed them to the ground, are full of life themselves.

In her backyard, she showed me the contemplative garden where all the plants that they received after their daughter’s death went.  There’s a seat there, and many flowers, and also a beautiful plum tree so laden with fruit that its branches stoop under the weight.  Their son has helped them prune the other fruit trees and put in raised beds for their vegetables.  There is nothing that impresses me quite so much as a veggie patch, and this was a fragrant, colourful beauty:  forests of chard, a minefield of purple beetroot, and tomatoes worthy of that scene in The Godfather.

Lee and I talked, and talked, and talked, and cried some, and the next day, when I was ready to come home, she walked me out into the garden with a large, flat basket, and picked me tomatoes, chard, many plums, and apricots.  I had a three-hour drive back home and My Baby and I were going away for the weekend the next day to another place also three hours away, and I knew some of the things Lee gave me would not last that long.  When I got home, I turned the chard into an early (and ersatz) Torta Pasqualina to take with us for our hosts, and I gently stewed the sweet ripe apricots until tender and put them in the ‘fridge for… whatever, whenever.

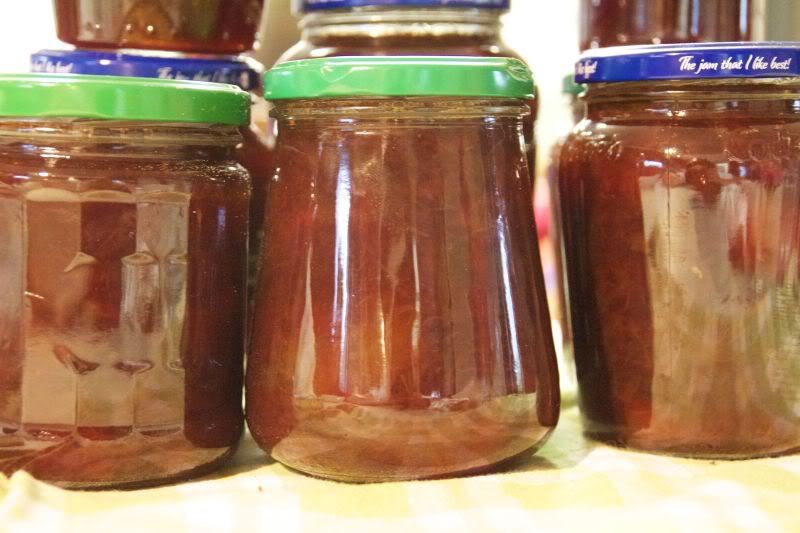
When I came home, we ate the tomatoes the way my mother called “split tomatoes”:  cut in half, scored lightly, sprinkled with salt, oregano, and good olive oil.  So good.  Then I made much plum jam.


The plums were on the greenish side, so the jam has a fabulous set and a gorgeous tart twang.  Then, I remembered the apricots.

I have some miniature pavlova shells that were tempting, but no.  What I really felt like was an apricot pie, but I wanted something lighter than the usual pie.  Then I remembered the fresh strawberry pie from a beloved book I have called American Pie, by Teresa Kennedy, and hey!  Adaptation ahoy!  For my pastry I went to Nidia's, and this is where the ugliness comes in.

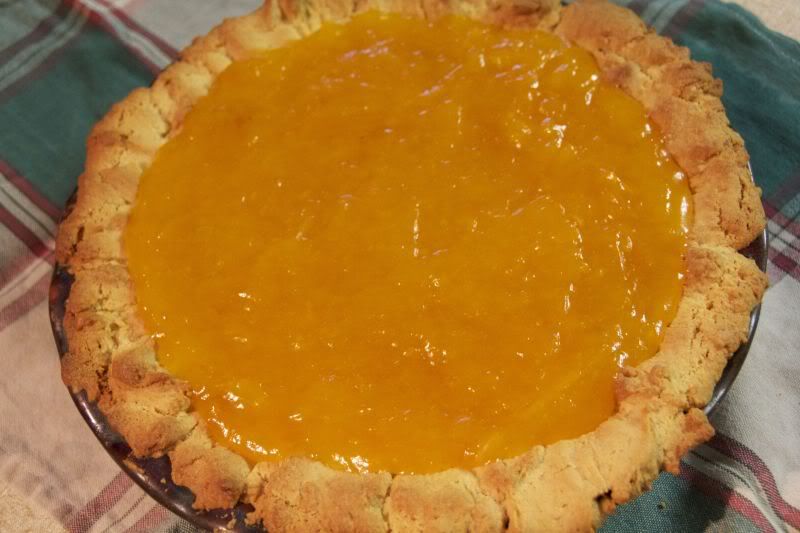
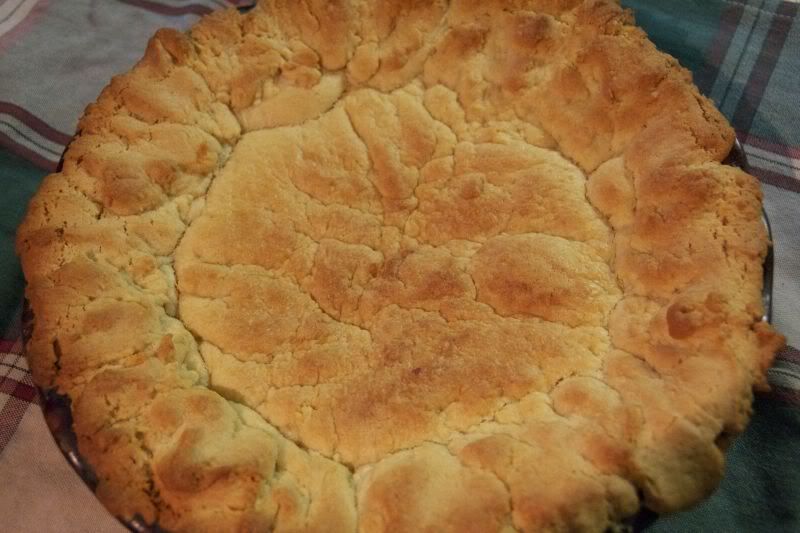
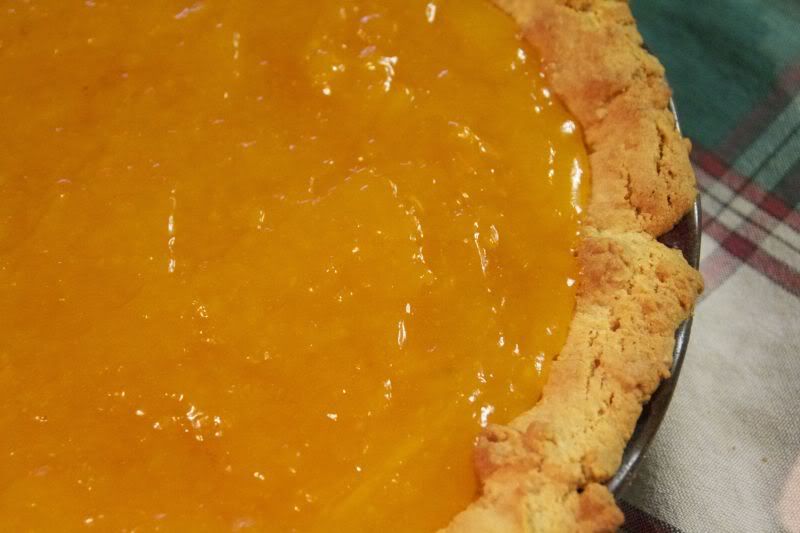
The recipe is for a beautiful, light, perfumed, cookie-like crust.  But mine turned out decidedly ugly.

Crust got da uggles!
Granted, I didn’t let the dough chill for the requisite hour (it’s a nightmare to roll while at anything other than ‘fridge temp), so it’s probably my fault, but I pressed on regardless.  I pressed on because the raw pastry tasted amazing, cooked it smelt divine, and I also remembered a little sweet that the Italians had before the French took over the world with their macarons (go on – put on a French accent and say it – macaron).  Brutti ma buoni are freeform Italian macaroons, and their name translates as “ugly but good”.

And this, I decided, was going to be my pie:  ugly but good.  And remembering Lee’s garden, and the dolphins playing in the water in view of their backyard while we thought of a loved one gone too soon, I thought it was apt.

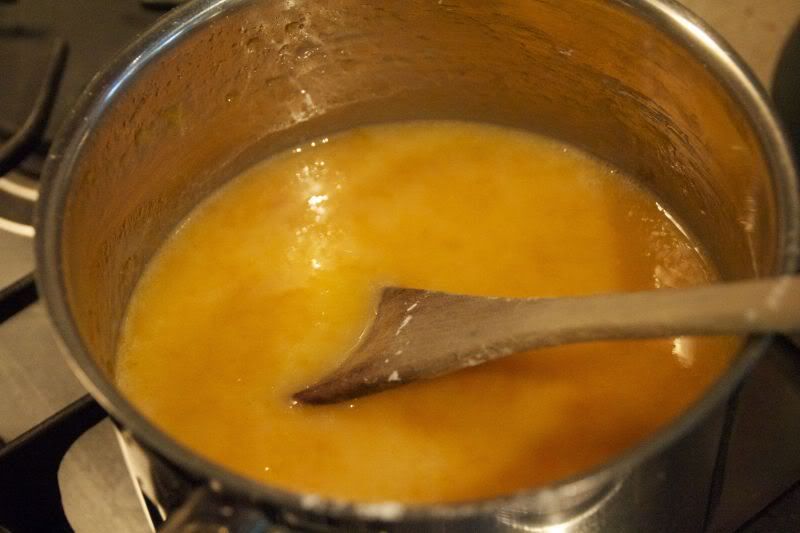
When you first combine the ingredients, it'll look cloudy on account of the cornflour.  Don't worry, it'll come good as gelatinization takes place.


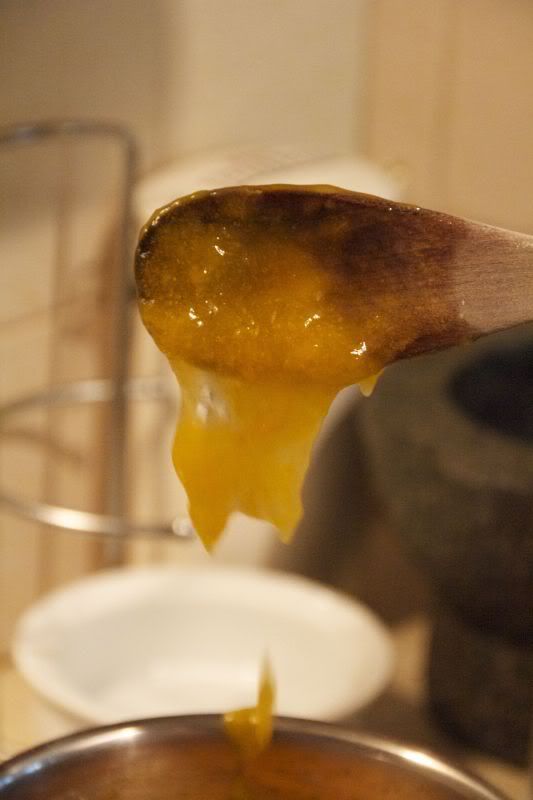
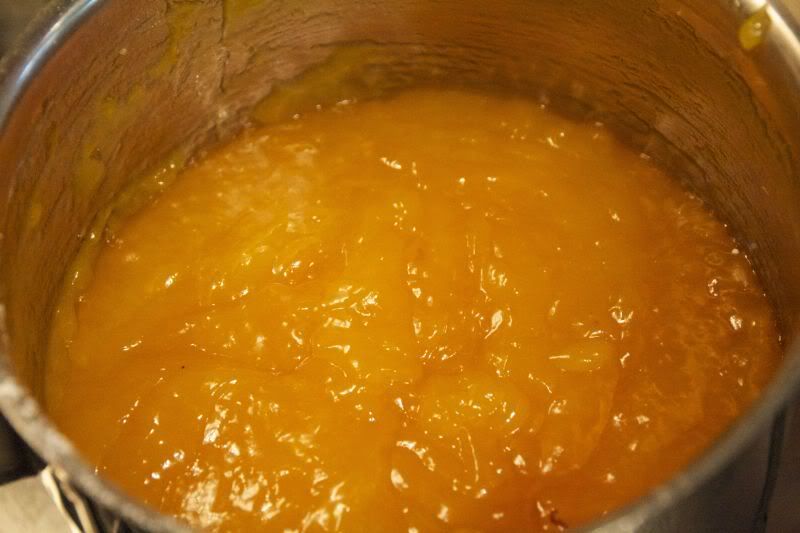
This is the filling after it comes to the boil.  See?  Super thick.   It should glop, not pour, from the spoon, and mound slightly when it falls.


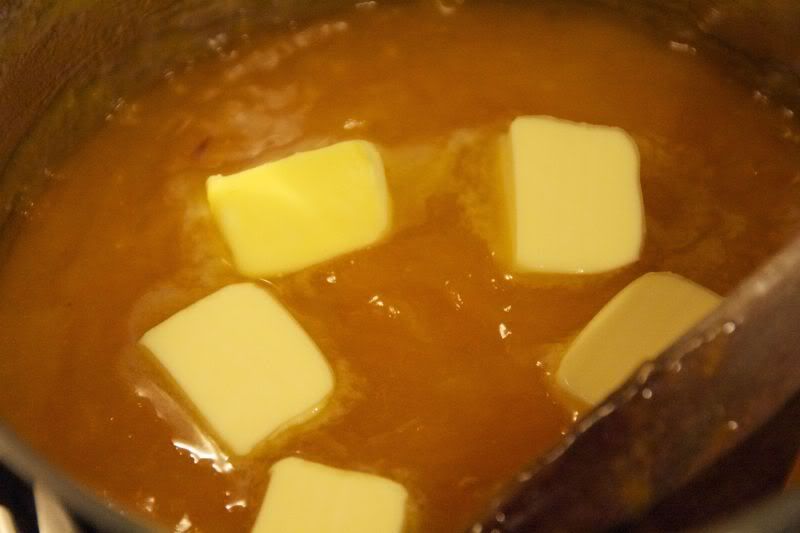
Add butter, and stir.  This will make the filling...


... gorgeously glossy.


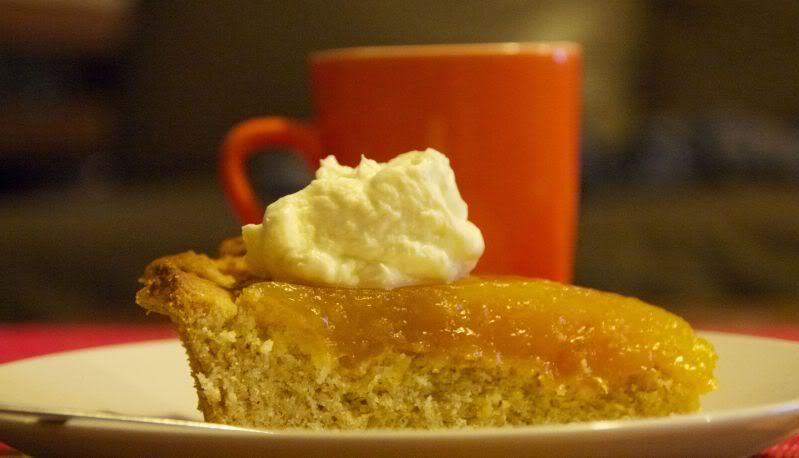
Pour filling into crust, and chill.  Have immoderate amounts of whipped cream on standby.


PERFUMED FRESH APRICOT PIE
The perfume comes from the crust, which is spectacular.  Keep the technique for the filling in mind for adaptation, too.  It’s good for any soft summer fruit.

Ingredients:

For the crust –
140g. sugar
100g. butter
3 egg yolks
3 tbsp. port
2 tbsp. milk
1 tsp. vanilla
425-450g. self-raising flour

For the filling –
1 cup apricot puree
1 cup sugar
1/2 cup water
1/4 cornflour (corn starch)
2 tbsp. unsalted butter
Whipped cream, to serve

Method:
1.  First, make the crust.  Cream sugar and butter in food processor until creamy.  Add egg yolks, and whizz.  Add port, milk, and vanilla, and give it a very quick whizz (mixture will curdle if you overwhizz).  Finally, add flour and pulse until a soft dough is formed.  Scrape onto a sheet of cling film and refrigerate for one hour. 
2.  Brush tart or pie pan with baker's secret or grease and flour.  Roll out dough, line pan, prick several times with a fork, and bake in a moderate oven for about 15 min., until golden.
3.  Next, make the filling.  Combine all ingredients except butter in a medium saucepan, and stir constantly until mixture boils and thickens.  It will be very thick and should mound when you drop it from the spoon.  Add butter, and stir until melted.  Mixture will now be gorgeously glossy.  Pour filling out into crust, and chill until set.  Serve with whipped cream.


Yumbo McGillicutty!

Tuesday, January 11, 2011

Everything old is yum again: garlic prawns


My Baby and I were trying to decide where to go out for dinner.

“What do you feel like?” he asked.

“Garlic prawns!” I exclaimed, then, thinking about it, went off on a rant.  “But where can you get garlic prawns these days?  They used to be on every bloody menu in every bloody restaurant, but now they’re gone!  Why?  WHY?”

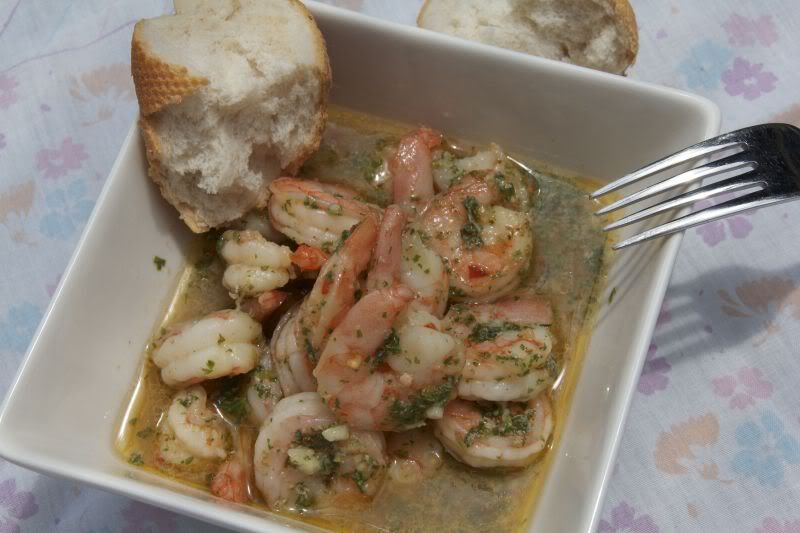
Well, we know why.  Food is subject to fashion as much as anything else, but it probably shouldn’t be; not when you remember how enjoyable some things – simple things - can be.  And what’s not to enjoy about the freshest, crunchiest prawns, with a puddle of the most deliciously garlicky, olive-oily juices to mop up with crusty bread?

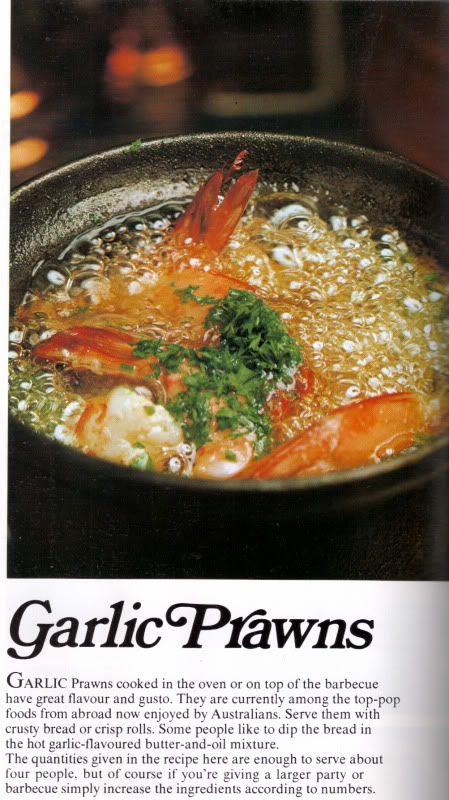
Although garlic prawns were subject to much bastardisation (particularly featuring pre-cooked prawns – shudder), those of us Of A Certain Age remember, in far less sophisticated, multicultural times, asking for them at the local pub or “continental” restaurant, where they would come, still sizzling, in an individual cast-iron cocotte sitting on its own wooden plate so it wouldn’t burn the dinner table.  Indeed I have a recipe here, from my trusty Australian Women’s Weekly Cooking Class Cookbook (no publication date listed), that describes the dish as one of the “top-pop foods from abroad”, and that expression, right there, tells you all you need to know about Australian cuisine in the mid-to-late 70s.


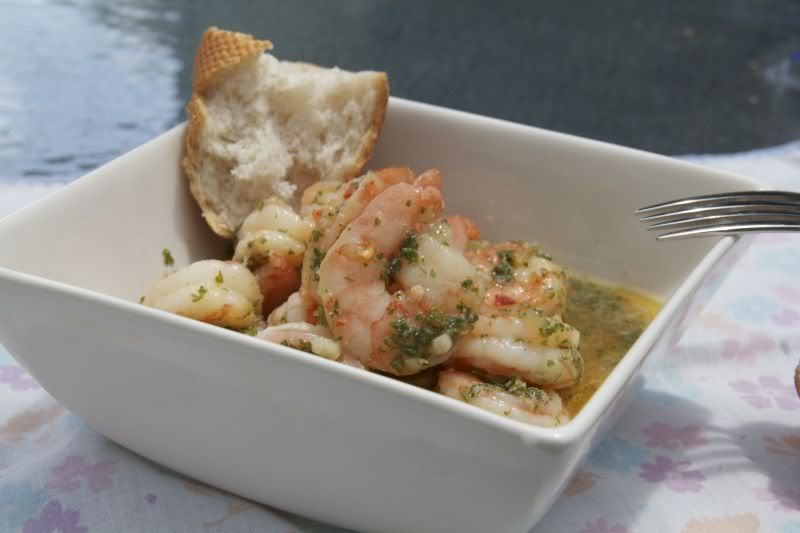
But coincidentally, while reminiscing, as well as ranting, I stumbled upon a recipe for Dee Dee's Sizzling Spanish Garlic Prawns, and therefore decided to stop reminiscing and ranting and just make them already.  With my ready-made provenzal, I literally had them in the pan in two minutes, and we were seated at table with garlicky, prawny goodness in front of us, 15 minutes after that (which includes plating-up time).

So here’s my take on Dee Dee’s already fine recipe.  I made these in one large pan, but if you want to dig out Mum’s cast-iron cocottes for individual servings, please do so, with my blessing.  Send pictures so that I can shed a sentimental tear.


GARLIC PRAWNS

Ingredients:
1 kg. green prawn meat (deveined)
1/4 – 1/3 cup provenzal
1/3 cup dry sherry
1/4 cup extra-virgin olive oil
1 tsp. dried chili
salt

Method:
1.  Preheat oven to 220oC.
2.  In a large cast-iron frying pan combine all ingredients except salt (salting prawns before cooking makes them tough – go figure since they’ve been living in salt water), making sure that prawns are well coated.
3.  Bake for 12 minutes, stirring once.  Salt lightly, and serve immediately with something starchy to mop up the juices.  (Rice is good – particularly if tossed in butter and Parmesan - but crusty bread is indispensable.)


Yumbo McGillicutty!

Tuesday, January 4, 2011

Tarty Tuesdays: Classic Tuna Pie


It’s summer in the southern hemisphere, and while that means a barbeque to many, if not most people, to me that’s just too restrictive.  Breakfast?  Outside!  Lunch?  Outside!  Dinner outside?  Heck yes!  And morning and afternoon tea too, with a paperback novel and my feet up on a neighbouring seat.

I don’t need “outdoor food” to eat out on my lovely and shady deck – I have table and chairs, after all, which surely allows for a degree of civilization even if aforementioned table and chairs were bought on sale from Bunnings – but it helps if the food is relaxed and uncomplicated.  I don’t want to worry about its presentation, or it going cold if there’s a beautiful breeze flowing.

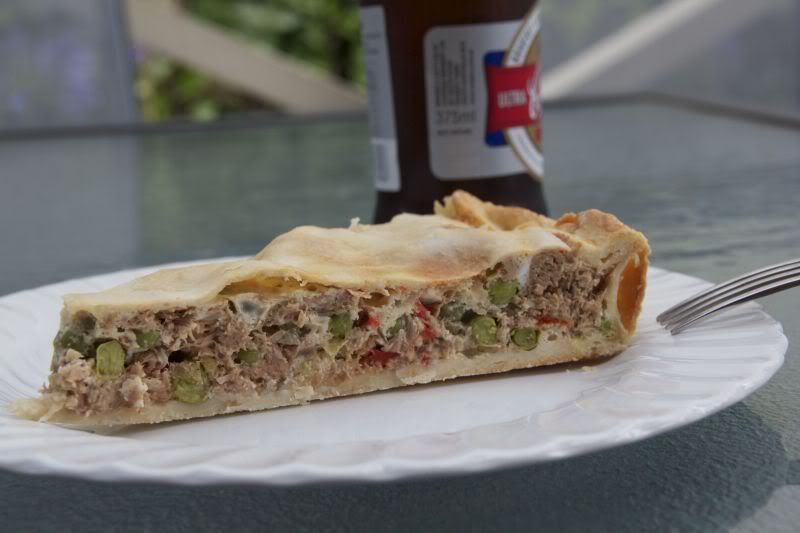
A savoury pie or tart, served cold, is perfect.  My beautiful, salsa-dancing cousin Silvia, who is an instinctual goddess in the kitchen, has a hand that turns everything delicious.  Last time I was at hers and my aunt’s house in Buenos Aires and stayed unexpectedly to dinner, she went into the kitchen, and refusing my offers of help, turned out dish after delicious dish in record time.  Everything was worth going on bended knee for, but surprisingly, what I wanted seconds of was this tuna pie, which she informed me was “simple but so classic”.  So classic, in fact, that I was embarrassed to admit I’d never tasted it, much less made it.  But I’ve been daydreaming about it ever since, and turned one out a few days ago for our New Year’s Day picnic.  It was almost as good as hers.

Part of the reason why Silvia was able to make the pie so quickly was the fact that she had store-bought discos de tarta on hand, but even without it, it’s still super-quick to make.  Nidia’s Tart Crust, below, is made in about two minutes with a minimum of fuss and mess (funnily enough, it is also the closest recipe to store-bought disco de tarta pastry that I have yet made) and makes for a pie that’s delicious hot or cold and will cut beautifully.

As an aside, I’m a huge fan of cut-and-come-again things during the summer.  Because of the heat-induced sluggishness, you want to take advantage of the times when you actually feel like cooking to cook something you can keep for when you won’t.  A whole ham – ubiquitous at this time of year – kept ready to go wrapped in damp muslin in the fridge, a boned, stuffed and roasted cold chicken, a hunk of muffuletta or pan bagna, a tart… these are things that can be waiting for you to approach knife in hand.  And go on – take that slice outside.  The cicadas are singing, the dog-eared paperback novel is waiting, and the world can just wait for a while. 
     

CLASSIC TUNA PIE

Ingredients:
1 x recipe Nidia’s Tart Crust (see below)
1 onion, thinly sliced
1 red pepper (capsicum), cut into fine dice
2 tbsp. extra-virgin olive oil
1 x 425g. tin tuna chunks in brine, drained
1 cup fresh or frozen peas
1/2 tsp. oregano
Salt, pepper, and chili to taste
3 eggs
150ml. light cream, or half-and-half (milk and cream)
Eggwash

Method:
1.  Preheat oven to 180oC.  Brush inside of tart/flan pan with Baker's Secret or line with baking paper.  Make up Nidia’s Tart Crust.  Roll out 2/3 of it and use it to line pan.  Prick several times with a fork, brush with some of the eggwash, and place in ‘fridge while you make the filling.
2.  Sauté onion and red pepper in olive oil until soft.  Transfer to a bowl and add tuna and peas, and season with salt, pepper, and chili to taste.  Spoon filling into tart crust.  Lightly whisk together eggs and light cream or half-and-half, and pour over filling.  Roll out remaining pastry and use it to top pie, crimping the edges together.  Cut out a vent with a sharp knife or kitchen scissors to allow steam to escape, and brush with egg wash.
3.  Bake in lower shelf of oven for ten minutes (this is for the base to firm up nicely), then transfer to highest shelf and bake until golden – 25-30 minutes approx.  Cool at least to warm before serving.  


NIDIA'S TART CRUST

Oh, we do get in a rut with our pastry, don’t we?  It’s puff and shortcrust, shortcrust and puff.  Yes, they are versatile, but they’re not always what you want.  First and foremost, both pastries are very, very rich, which might make a pie or tart out of the question for you, but also might not suit a more rustic filling, or suit an occasion, such as a picnic, when you want something a little sturdier.

Nidia, from Recetas Simples y Deliciosas, has a wonderful recipe that not only fits the bill, but is also done in two shakes.  There’s no cutting in butter, no working with ice-cold ingredients, no worrying about working the dough too much, and no banging around.  You can make it ahead of time if you like, but it’s so quickly and easily made that you’ll probably find it’s not necessary.  And because it’s a cross between pastry and dough, it is also – joy of joys – fairly low in fat.  All up, this recipe is reason enough to make pies and tarts on a regular basis, I reckon.

Thank you Nidia for letting me repost the recipe, this time in English.

Ingredients:
250g. plain flour
1 tsp. salt
1 egg
1/4 cup (60ml) milk
3 tbsp. (45ml) vegetable oil

Method:
1.  Combine flour and salt in a bowl.  Make a well in the middle and add remaining ingredients.  Gradually mix flour into the well to obtain a soft dough that does not stick to your hands.  Wrap in plastic and allow to rest for 30 minutes if you have time, but if not, proceed with the recipe.


The Essential Ingredient: Baker's Secret


Every cook has his or her peeves.  Mine are peeling potatoes (but I justify not doing it by telling everyone we all need the extra fibre in the mash) and greasing-and-flouring (which I don’t justify at all but accompany with much swearing).

Oh, man.  I LOATHE greasing-and-flouring.  And it’s not like I’m using complicated pans most of the time, either, just your standard square, round, and rectangular.  But greasing-and-flouring is enough to make me think twice about baking something, and it is also the reason why I buy silicon baking paper in commercial kitchen sized rolls.

But sometimes baking paper won’t do, and you need to grease and flour.  Nonstick spray is tempting for the greasing part, but it actually wrecks your pans.  No matter how good it is, it leaves behind a residue that turns gummy on baking, and is then almost impossible to clean off without damaging the coating on your pans.  Whatever you don’t clean off is there forever.

The solution is Baker’s Secret, which is no secret, and has been around for many a year.  We’re not talking a commercial product here, no fancy non-stick compounds in an aerosol pack, but something you put together with three common ingredients in about 30 seconds.  Simply brush it inside your pans instead of greasing-and-flouring and your baked goods will slip out (and off) like magic, with a gorgeous golden crust to boot.  No gungy residue, no mess, no Vibey swearing like a trooper over SPENDING FIVE MINUTES GREASING AND FLOURING THE BLOODY THING AND STILL MISSING A BIT THERE WHERE THE FINGERTIP OF MY PINKIE WAS RESTING.


BAKER’S SECRET

Ingredients:
Plain flour
Oil
Butter or shortening, softened

Method:
Simply combine equal quantities of all ingredients until smooth.  Store in a covered jar or plastic container in the ‘fridge.  Baker’s Secret will keep for about two months.